Your nightguard works hard to protect your teeth, but how well are you protecting it?
If you’re not routinely washing your guard, it might just be the dirtiest thing you put in your mouth every night.
And while cleaning it helps avoid funky smells, the biggest benefit is that it’ll do more to protect your teeth, gums, and overall health when it’s clean. A proper cleaning routine can prevent bacteria buildup, extend your nightguard’s life, and save you money in the long run.
Stick around for the best tips on how to clean a nightguard and avoid common mistakes that can ruin yours.
Do I Need to Clean My Nightguard?
Yes, you must keep your nightguard clean. In fact, it needs to be part of your regular oral care routine!
Why is it so important to clean your nightguard?
- It is a sponge for bacteria, plaque, and saliva. If you don’t regularly clean it, it will quickly turn into a breeding ground for harmful germs that can cause gum irritation, bad breath, and (if you’re unlucky) infections.
- If you’ve ever noticed a funky smell or yellowish discoloration, that’s a sign your nightguard isn’t as clean as it should be.
- Plus, if it smells weird, would you want to put it in your mouth? Keeping it clean will make you more likely to wear it.
- While not the most expensive dental appliance out there, they’re not free. Learning how to clean a nightguard properly can save you from replacing it prematurely. This is because proper care prevents cracking, warping, and wear caused by improper maintenance or buildup. In short, clean nightguards last longer, so you save money.
How to Clean a Nightguard
Quick Clean (Every Day)
To learn how to clean a nightguard quickly, all you have to do is follow 3 simple steps: rinse, brush, and dry.
1. Rinse
Right after you take out your nightguard, rinse it under lukewarm water. This will remove debris particles and loosen plaque.
2. Brush
Next, much like brushing your teeth, you’ll want to brush your nightguard.
Use a soft-bristle toothbrush with mild soap or water. Some people like to use a separate toothbrush for their nightguard, but it’s okay to use your regular one.
And while it might be intuitive to apply toothpaste on the brush, it might actually scratch the device. Toothpaste can be abrasive, so using it to clean your guard might cause it to wear out more quickly. A better option is using something like dish soap or a good, non-abrasive cleanser (more on that later).
3. Dry
Let your nightguard air dry on a clean, flat surface for 15–30 minutes. To prevent bacteria growth, make sure it is completely dry before storing it in a case.
These steps are essential if you want to know how to clean a nightguard daily without damaging it.
Deep Cleaning (Once a Month)
At least once a month, you’ll want to do a deep clean of your guard. There are two main ways to do so:
Over-the-Counter Nonabrasive Cleaners
You can buy a non-abrasive denture cleaner from the store to help deep clean your nightguard.
All you need to do is dissolve the cleaner in a bowl or glass of water and soak your nightguard according to the package instructions.
DIY Solution
For a simple (yet effective) at-home option, you’ll want to use hydrogen peroxide and vinegar.
- Start by soaking your nightguard in distilled vinegar for 30 minutes.
- Afterward, rinse both the nightguard and the container thoroughly with water.
- Next, place the nightguard in hydrogen peroxide for another 30 minutes.
- Rinse again and let it air dry completely before use.
What You Need To Know About Cleaning Your Nightguard
How Long Should My Night Guard Last?
On average, nightguards last around five years.
Keep in mind that heavy wear and tear may require you to replace it as soon as one year.
To get the most out of your nightguard’s lifespan, you’ll want to learn how to clean a nightguard the right way to get it to stay fresh, free from bacteria, and in good condition for as long as possible.
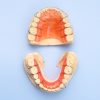
Which Nightguard Should I Get?
Grinding your teeth at night? The right nightguard can save your teeth. Depending on the intensity you grind your teeth at night, the best nightguard will vary.
Here’s what we recommend:
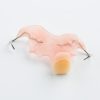
For light to moderate grinding, the Custom-Made Soft Nightguard is your go-to. At just 3 mm thick, it’s lightweight, durable, and so comfortable you’ll barely notice it’s there.
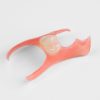
If your grinding is more intense, the Custom-Made Hard Nightguard will be better for you. Made from a rigid, crystal-clear medical-grade thermoplastic, this tough 2 mm guard provides maximum protection against heavy clenching and grinding forces.
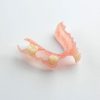
The Comfort Hybrid Nightguard (the most popular choice) combines the best features of soft and hard guards into one truly special design. The soft inner layer is there for your comfort, and the hard outer layer for strength. It’s perfect for protecting dental work like crowns, bridges, or implants while relieving jaw pain and tension caused by bruxing and clenching.
7 Common Mistakes to Avoid
Major mistakes that new nightguard owners make that will damage your nightguard include:
- Not cleaning regularly.
- Using abrasive cleaners.
- Exposing your nightguard to high heat (like boiling water or dishwashers).
- Soaking for over an hour (this can weaken the material).
- Soaking in alcohol-based liquids like mouthwash.
- Storing in humid bathrooms.
- Letting pets use it as a chew toy (yes, it happens).
4 Tips for Long-Term Care
- Rinse and clean your nightguard every day.
- Soak your nightguard in a cleaning solution at least once a month (or more often if needed).
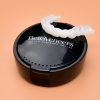
- Cleaning your nightguard only to put it in a dirty case kind of defeats the purpose. So, wash the storage case with soap every few days and let it dry completely.
- Keep your nightguard in a ventilated case away from extreme heat or cold to prevent mold and odors.
Invest in Your Nightguard’s Care Today
Now you know how to clean a nightguard!
Keeping it clean is simple, but it makes a huge difference for your oral health and the lifespan of your appliance. A well-maintained nightguard lasts longer, protects better, and feels more comfortable.
Are you ready to invest in your best nightguard yet? See some of our custom-fit nightguards at Dental Labs Direct and experience the difference.