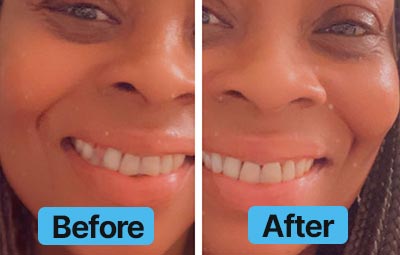
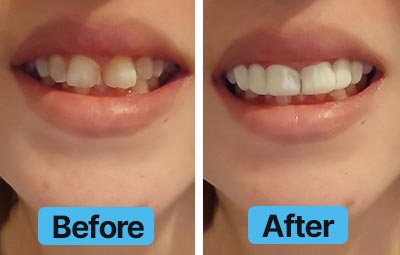
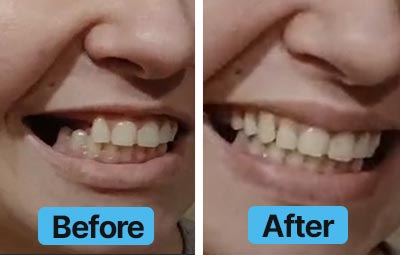
Most dental night guard side effects are minor inconveniences or adjustment hiccups that fade with time or proper fit corrections.
Night guards are a proven way to protect your teeth from grinding, a condition known as bruxism. About 8% of adults suffer from bruxism regularly, and many more on occasion.
To protect your teeth and alleviate jaw strain, virtually all dentists recommend getting a night guard. However, some new users experience certain dental night guard side effects or hear alarming myths that make them never want to try wearing one.
But we’re here to help teach you what’s normal, what isn’t, and how to get your night guard to be as comfortable and beneficial as possible.
Common Dental Night Guard Side Effects
For most people, any side effects of wearing a night guard are minor and short-lived. After all, it takes a little time for your mouth to get used to having a foreign object in place during sleep, but with that said, certain issues can pop up, especially if the night guard doesn’t fit quite right.
Here are some of the most commonly reported dental night guard side effects and how they typically present.
Side Effect
Cause
Duration
Solution
Initial Discomfort or Soreness
Mouth adjusting to a new appliance.
Lasts a few days to 2 weeks.
Persistent soreness may need a fit adjustment.
Excess Saliva or Dry Mouth
Body reacting to a foreign object in the mouth.
Resolves in a few nights.
Manage dry mouth with hydration or a humidifier.
Gag Reflex
Guard is too bulky or extends too far back.
Most people adapt over time.
Can’t adapt? Try a thinner or smaller guard.
Pressure Spots or Poor Fit Pain
Guard is too tight or misshapen.
Stop use if you have persistent pain.
Have it adjusted or replaced.
Teeth Shifting or Bite Changes
Uneven pressure from an ill-fitting guard.
Stop use if your teeth shift.
Custom guards prevent this.
Jaw Pain or TMJ Soreness
Improper guard design or thickness.
Stop use.
Try a thinner night guard.
Allergic Reactions (Uncommon)
Allergy to materials like latex or acrylic.
Stop use.
Switch to a hypoallergenic guard if needed.
As you can see, some side effects are related to the fit and initial adjustment period. Things like minor discomfort or drooling are typically transient and resolve as you get used to the device. The more problematic issues, like significant pain, shifting teeth, or jaw problems, are usually signs that something is wrong with the guard’s fit or design, to which you’ll probably need to get a better-fitting guard, rather than just enduring the discomfort.
Debunking Myths About Dental Night Guard Side Effects
There’s a lot of information floating around about night guards, and not all of it is accurate.
Myth
Fact
“Wearing a night guard will make your teeth loose or shift out of alignment.”
A properly fitted night guard will not loosen or shift your teeth. Only ill-fitting, poor-quality guards may cause uneven pressure, potentially leading to minor movement. A custom-fitted guard makes it so that force is evenly distributed, which in turn helps prevent bite changes.
“Night guards cause TMJ problems or jaw pain.”
Night guards are often recommended for TMJ relief. Problems only arise when the guard is the wrong type or poorly fitted, which can affect your bite. The right style, material, and fit can actually ease jaw tension and protect the TMJ.
“If a night guard is uncomfortable or painful, you just have to tough it out.”
Discomfort should be temporary. Persistent pain signals a poor fit or the wrong guard type. Don’t ignore ongoing soreness and either have it adjusted or replaced. A well-fitted night guard should feel comfortable after a short adjustment period of maybe 2ish weeks.
Many “side effects” or horror stories you hear about dental night guard side effects are actually cases of someone using a suboptimal guard. When you use a high-quality custom guard, the risks of serious side effects are extremely low.
How to Minimize Side Effects and Improve Comfort
The good news is that most dental night guard side effects can be prevented or easily managed.
Tip 1: Get a Custom-Fit Guard
Whenever possible, opt for a professionally made custom night guard instead of a basic store-bought one, because custom guards vs OTC ones makes a big difference. A guard tailored to your exact dental impressions will fit much more comfortably and won’t create the pressure points that generic guards can.
And yes, custom guards cost more than over-the-counter versions, but they dramatically reduce the likelihood of issues like tooth shifting and pain. In the long run, a custom appliance is worth it for the comfort and protection it provides.
Tip 2: Wear for a Few Hours a Night to Begin With
Don’t feel you have to immediately wear your night guard for 8 hours on the first night. A great way to adapt is to gradually increase wear time.
Try wearing it for an hour or two before bed at first, so your mouth acclimates while you’re still awake. Then wear it for a partial night, and eventually for the whole night. Many people find that after a week or two of gradual adaptation, they can sleep through the night with the guard comfortably in place.
Tip 3: Practice Good Hygiene
A dirty guard can lead to gum irritation and bad breath. To keep your night guard clean, rinse and gently brush your night guard with a soft toothbrush after each use, and let it dry completely before storing to prevent bacteria buildup and funkiness.
Also, always store your guard in a ventilated case since a moist and closed environment is a breeding ground for germs.
Tip 4: Address Problems Early
Pay attention to what your mouth is telling you. If you experience persistent pain, significant bite changes, or anything that just feels very “off”, don’t ignore it.
Bottom Line
Night guards are extremely useful devices for protecting your teeth and jaw from the effects of grinding. Most dental night guard side effects are minor inconveniences or adjustment hiccups that fade with time or proper fit corrections. The serious-sounding problems are largely avoidable by using a high-quality, custom-fitted guard, so don’t let the myths or initial discomfort scare you away; millions of people wear night guards every night and do not experience lasting negative effects.
Protect your smile the smart way. Get a high-quality custom-fit night guard from Dental Lab Direct and enjoy professional quality without the dental office markup. Comfortable, effective, and delivered straight to your door, because a good night’s sleep shouldn’t come with jaw pain.
Rinse and brush your night guard every morning. That two-minute habit prevents most of the smell and staining people complain about.
Deep clean it weekly, not monthly. A weekly soak reaches buildup that a quick brush leaves behind.
Safe deep-clean options: a cleaning tablet, diluted white vinegar, or hydrogen peroxide, for 10 to 30 minutes. Never soak longer than an hour, and never every day.
A bad smell or a cloudy film is not just normal. It is bacteria or hard-water minerals, and both are fixable.
Skip toothpaste, hot water, the dishwasher, alcohol, mouthwash, and bleach. Each one quietly shortens the guard’s life.
A well-kept guard lasts a few years. Cracks, warping, or a smell that will not leave mean it is time to replace it, not clean it.
The two-minute habit that keeps your guard from getting gross
Here’s the catch with a night guard: the same appliance that protects your teeth all night sits warm and wet in your mouth for eight hours, which makes it a comfortable home for bacteria. Skip the cleaning and it can become the dirtiest thing you put in your mouth. Researchers who swab worn oral appliances regularly find bacterial and yeast buildup on guards that are not cleaned well [4].
Good news: knowing how to clean a night guard is mostly two simple habits and a short list of things you should never do. You do not need special gear. You need about two minutes a day and one soak a week.
The steps for how to clean a mouthguard, a sports gum shield, or a bite guard are the same, so if you wear more than one appliance, the same routine covers all of them.
Cleaning made easy — one tablet, one glass of water.
Dental Lab Direct’s Denture and Retainer Cleaning Tablets work on night guards, mouthguards, and retainers. $14.99 for 30 tablets, or four payments of $3.75.
More often: if it starts to smell, looks cloudy, or you grind hard enough to leave wear marks.
That weekly number matters, and it is the one place a lot of guides (ours included, in older posts) used to say monthly. Brushing handles the surface, but a soak is what reaches the film brushing misses, so once a week keeps the guard genuinely clean instead of just rinsed. It is a small change with a real payoff.
How to clean a night guard every day
A night guard, essentially a mouthguard you wear at night for grinding, only needs three steps each morning.
Rinse. The moment you take it out, rinse it under lukewarm (not hot) water to wash off saliva and loose debris before they dry on.
Brush. Brush all surfaces with a soft-bristle toothbrush and a little mild hand soap or dish soap. Skip the toothpaste. It feels right, but toothpaste is abrasive and scratches the surface, and those tiny grooves are exactly where bacteria settle in [1].
Dry. Let it air-dry fully on a clean, flat surface, about 15 to 30 minutes, before it goes back in the case. A guard stored damp grows bacteria. A guard stored dry does not.
How to deep clean a night guard (weekly)
Once a week, give it a soak. You have three solid options.
Cleaning tablets. Drop a denture-and-retainer cleaning tablet in a glass of warm water, add the guard, and soak for the time on the package, then rinse. The ADA notes that accepted denture-appliance cleansers reduce bacteria on removable appliances like night guards [2]. This is the easiest route, and the one we carry for exactly this job.
The natural method, vinegar and hydrogen peroxide. Soak the guard in distilled white vinegar for 30 minutes, rinse it, then soak in hydrogen peroxide for another 30 minutes and rinse again [3]. The vinegar lifts mineral buildup. The peroxide handles odor and bacteria.
The guardrail. Keep each soak to 30 minutes, never go past an hour total, and do not do the vinegar or peroxide soak daily. These are mild acids and oxidizers. Weekly, they clean. Daily, they slowly break down the plastic your guard is made of, and that shows up as a guard that warps or cracks early.
Here is how the methods stack up:
Method
How
How often
Cost
The catch
Daily brush + soap
Rinse, soft-brush, air-dry
Every morning
About free
Does not reach deep buildup on its own
Cleaning tablet
Dissolve, soak 10 to 30 min, rinse
Weekly
About $15 / 30 ct
Follow the package time
Vinegar + peroxide
30 min each, rinse between
Weekly
About free
Acidic, never daily, never over 1 hour
Ultrasonic cleaner
Water bath, run a cycle
Weekly
$30 to $60 device
Overkill for most people
How to fix a night guard that smells or looks cloudy
These are the two problems people search for most, so here is the straight answer.
The smell. It is bacteria, full stop. Move to the weekly soak, dry the guard fully before storing it, and wash the case too. A clean, dry guard does not smell.
The cloudy or white film. That is usually hard-water minerals, not permanent staining. A 30-minute white-vinegar soak dissolves it. If the cloudiness will not clear after a good soak, the surface is wearing out, and that is a replacement signal, not a cleaning one.
What most cleaning guides skip: the plastic, not just your breath
Here’s what most cleaning guides miss. They tell you what kills bacteria, but not what each method does to the guard itself. As the lab that makes these guards, that is the part we pay attention to.
Your night guard is a precision piece of medical-grade thermoplastic, fitted to your teeth. Heat warps it. Abrasives scratch it. Strong chemicals and long soaks degrade it. So the best routine is not the most aggressive one. It is the one that gets the guard clean without shortening the life of a custom-fit appliance. That is why the weekly soak with a 30-minute cap beats a daily chemical bath, and why a soft brush beats toothpaste. Clean it right and a good guard lasts years. Clean it harshly and you will replace it long before you should.
What NOT to do
A few habits do real damage:
Toothpaste: too abrasive, scratches the surface [1].
Hot or boiling water and the dishwasher: heat warps the fit [1].
Alcohol, mouthwash, or bleach: these dry out and degrade the material.
Overnight or all-day soaking: more than an hour in any liquid weakens the plastic.
Storing it damp in a closed case: that is how a guard grows the smell you are trying to avoid.
Don’t forget the case (and what it’s made of)
A spotless guard in a dirty case is back to square one. A grimy case harbors bacteria that transfer straight back onto the guard, so wash the case weekly with warm soapy water and let it dry fully [1]. You can even drop a cleaning tablet in with it.
The case design and material matter more than most people expect:
Vented, not airtight. Choose a rigid plastic case with small air holes. The vents let the guard finish drying and let moisture escape. Airtight boxes and zip bags trap moisture, and a damp guard in a sealed case is how you get heavy bacterial growth and even black mold [1][3]. If your guard came in a sealed-feeling box, swap it for a vented one.
Hard case over soft pouch. A rigid case protects the fit, since a crushed guard no longer seals to your teeth, and it is far easier to rinse out than a fabric pouch.
Antimicrobial cases are a bonus, not a substitute. Some cases now use antimicrobial additives such as silver, zinc, or copper ions, which inhibit bacterial growth, with silver effective even against biofilms [6]. Useful, but the vents and the daily drying habit do more for cleanliness than any material claim.
Replace the case when it cracks, stops closing, or will not come clean. Cases are cheap. Reinfecting a clean guard is not.
What to do next, based on your situation
Match your situation to the move.
If it just smells: start the weekly soak and dry it fully before storing. The smell should be gone within a week.
If it is cloudy or has white buildup: soak it in white vinegar for 30 minutes. If it stays cloudy, it is aging out.
If it is cracked or warped: stop wearing it. Cleaning cannot fix a damaged guard, and a warped one no longer protects your teeth. Replace it.
If you only grind once in a while: you may not need a custom guard at all. A drugstore boil-and-bite can be a fine stopgap for light, occasional grinding, and there is no reason to spend more than your situation calls for.
If you grind nightly or protect dental work: a custom-fit guard is worth it, and the right type depends on how hard you grind. We make three, all from FDA-approved, BPA-free material:
If your guard is somewhere between still fine and ready for the trash, or your jaw pain or grinding feels severe or undiagnosed, that is worth a real conversation, with us about a replacement or with a dentist about the grinding itself. Reach out here and we will point you the right way, even if the answer is not a purchase.
FAQ
Can I clean my night guard with toothpaste?
No. Toothpaste is abrasive and leaves micro-scratches where bacteria collect. Use mild soap and a soft brush instead [1].
Can I soak it in mouthwash or alcohol?
Skip both. Alcohol-based liquids dry out and degrade the material over time. A cleaning tablet or a diluted vinegar or peroxide soak is safer.
How do I get rid of the smell?
The smell is bacteria. Do a weekly soak, dry the guard completely before storing it, and wash the case. That clears it for almost everyone.
Why is my night guard cloudy or turning white?
Usually hard-water mineral buildup. A 30-minute white-vinegar soak dissolves it. Cloudiness that will not clear means the guard is wearing out.
Can I use denture or retainer tablets, and is cleaning a mouthguard any different?
Yes to tablets, they are made for this. And no, the steps for how to clean a mouthguard, retainer, or night guard are the same: rinse, brush, weekly soak, dry.
How often should I replace my night guard?
With good care, a few years. Replace it sooner if you see cracks or warping, or if the fit changes or the smell will not go away.
How do I clean my night guard naturally?
Use the natural soak: distilled white vinegar for 30 minutes, then hydrogen peroxide for another 30 minutes, rinsing in between, once a week. The vinegar lifts mineral buildup and the peroxide neutralizes odor, with no harsh chemicals needed. Keep each soak to 30 minutes and do not run it daily.
Keep it clean, keep it longer
Cleaning a night guard is not complicated once you know the rhythm. Rinse and brush it daily. Soak it weekly. Store it dry. Once you know how to clean a night guard, the routine takes about two minutes, and it keeps your guard fresh and protecting your teeth for years. When it is finally time for a new one, you can skip the dental-office markup and order a custom guard direct.
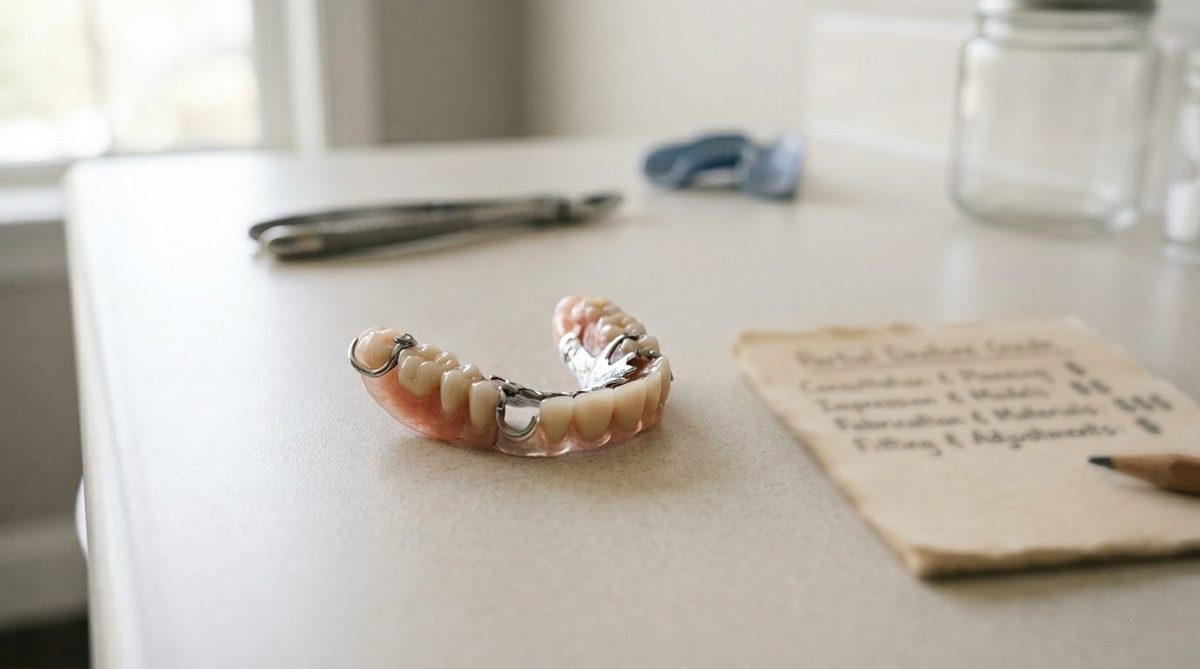
Partial dentures cost between $300 and $5,000+ per arch depending on material, case complexity, and where you buy. Most people pay $800 to $2,500 through a dentist office. Lab-direct sellers like us start at $299, below the bottom of the typical range, because we cut the office overhead.
Three things drive the price: material grade (acrylic, flexible nylon, or cast cobalt-chromium), case complexity (number of teeth, location, arch), and channel (DIY, lab-direct, dentist-fitted). The lab that fabricates the device is often the same across channels.
At a dentist office, $800 to $2,500 pays for the device plus chair time, the dentist’s diagnostic time, multiple adjustment visits, and office overhead. For complex cases, those services add real value. For straightforward cases, that overhead is the gap between what your device costs and what the office charges.
Insurance typically covers 40 to 60 percent of major services like partial dentures after deductible, with annual maximums of $1,000 to $2,000. Many plans have 6 to 12 month waiting periods on major services.
ISO 20795-1 sets the international standard for denture base polymers. A partial that meets this spec lasts 5 to 8 years; cheaper devices that miss the spec often fail within 12 months. Material grade matters more than channel for long-term cost-per-year math.
Honest carve-out: complex cases (severe periodontal disease, multiple abutment teeth, planned implant work, monomer allergies) often warrant the dentist-fitted price because the clinical time is the value. For straightforward cases, lab-direct delivers the same fabrication for a fraction of the price.
What partial dentures actually cost (cutting through the explainers)
You’re researching partial dentures. The price quoted at a dentist office and the price quoted online can differ by thousands of dollars for what looks like the same device. The question almost every shopper asks first: why?
Most cost articles give you a price range and stop there. We’re going to show you where the money actually goes (material, lab labor, lab overhead, channel margin) so the range makes sense. Then we’ll walk through what you actually pay for at $800 to $2,500, what’s useful at that price tier, and what’s overhead that doesn’t make the device any better.
We’re a US dental lab. We’ve been making partial dentures for 25+ years. The cost math below is from the inside.
Here’s the cost question, broken down.
How much do partial dentures cost?
The short answer: partial dentures cost $300 to $5,000+ per arch. Most people pay $800 to $2,500 through a dentist office [1]. Lab-direct sellers like us start at $299.
National averages from the ADA’s 2022 Survey of Dental Fees: a resin (acrylic) partial averages $1,738. A cast metal partial averages $2,229 [1]. Flexible nylon (Valplast, Duraflex) partials sit between the two. The exact price depends on material, case complexity, and where you buy.
Three things drive the price
Driver 1: Material grade
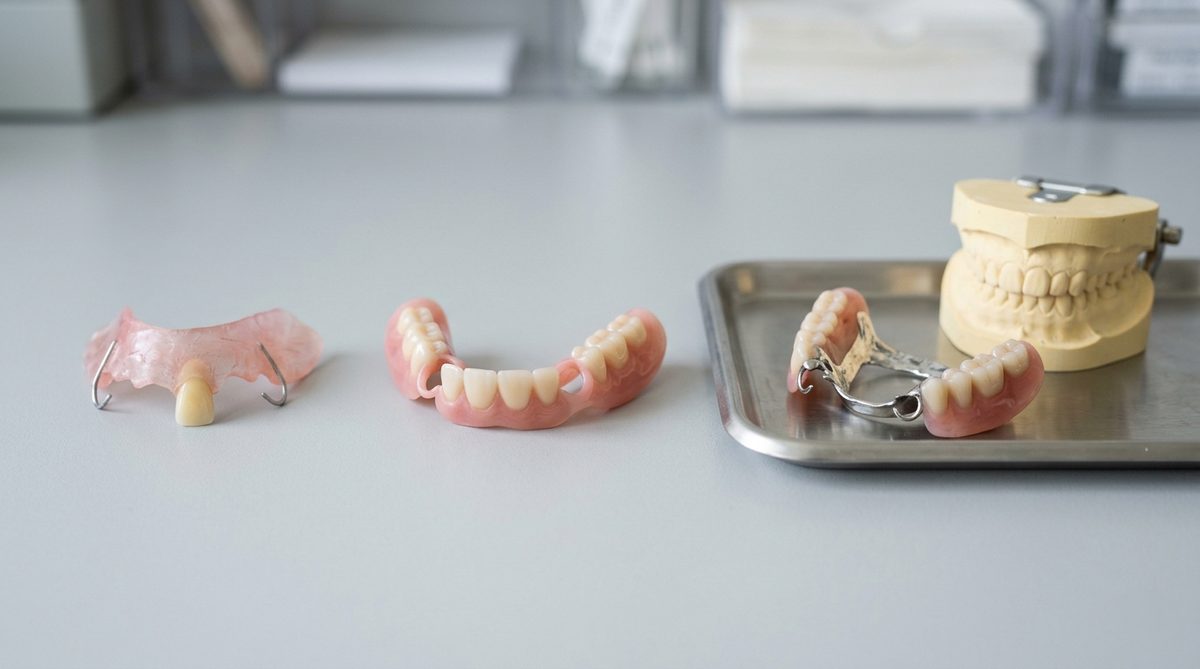
Heat-cured PMMA acrylic. The lowest-cost lab material. Higher density, lower residual monomer than self-cured acrylic, longer service life. National average price $1,738 at a dentist office. Our starts at $449. Acrylic partials use metal clasps to retain the device. Best fit for budget-conscious cases without metal-allergy concerns.
Flexible nylon thermoplastic (Valplast, Duraflex, TCS). Mid-range pricing, metal-free, hypoallergenic, gum-toned. No visible clasps. More comfortable for most wearers than acrylic. Our starts at $549. Best fit for aesthetic priority, metal allergies, or front-teeth replacement.
Cast cobalt-chromium framework. The highest-end lab-fabricated option. Thinnest profile, 10+ year lifespan, supports complex multi-tooth replacements. National average $2,229 at a dentist office. Best fit for complex multi-tooth cases or long-term durability priority.
Driver 2: Case complexity
Number of teeth replaced. A single-tooth flipper or (starts at $399) costs less than a 4-tooth bilateral partial.
Location (front vs back). Front-teeth partials need more aesthetic work: shade matching, contouring, gum-tone blending. The same material can cost more for front-teeth cases.
Arch (upper vs lower). Upper partials gain retention from the palate. Lower partials sometimes need more clasp engineering to stay seated.
Existing teeth condition. Abutment teeth (the natural teeth supporting the partial) sometimes need cleanings, fillings, or crowns before a partial can fit properly. That dental work is billed separately and is one of the biggest costs people don’t anticipate when getting a partial at a dentist office.
Driver 3: Where you buy (the channel)
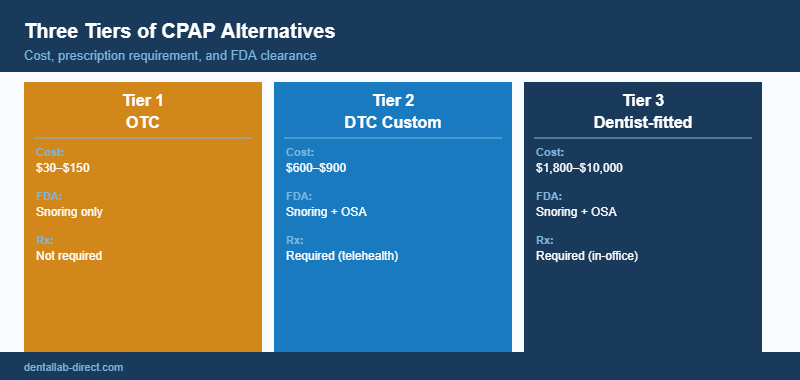
DIY / no-impression online ($50 to $200). Boil-and-bite kits or pre-formed flippers. Not custom-fit. Lower-grade thermoplastic. Lasts 6 to 18 months. Best fit for short-term placeholder only.
Lab-direct DTC ($299 to $900 typical, including our entire range). Custom impression from an at-home kit, lab-fabricated from professional-grade materials, shipped direct. No office overhead. Best fit for stable mouth, straightforward case.
Dentist-fitted custom ($1,500 to $4,000+). In-office impression, the dentist’s diagnostic time, multiple adjustment visits, insurance billing handled. Best fit for complex case, multiple abutments, periodontal concerns.
Where the money goes (the lab-side breakdown)
Here’s what most cost articles won’t say out loud.
The cost components
A partial denture’s retail price breaks down roughly like this. These are industry-typical ranges, not DLD-specific; the actual mix varies by seller.
Material cost: 5 to 15 percent of retail. The actual PMMA, nylon, or cobalt-chromium. A few dollars to a few tens of dollars of raw material per device.
Lab labor: 15 to 25 percent. Technician time. Impression review, model pouring, wax-up, processing, finishing, articulator-verified occlusion, and QC. A skilled lab technician at our facility might spend 2 to 4 hours per partial.
Channel margin / office overhead: this is the variable. At a dentist office, 40 to 60 percent of retail goes to chair time, dentist time, hygienist support, office rent, practice management, and front desk staff. At a lab-direct seller, this drops to 5 to 15 percent because we skip almost all of that overhead layer.
So a $3,000 dentist-fitted partial and a $549 lab-direct partial can be the same lab-fabricated device. The difference is what the office layer adds.
What you actually pay for at $800 to $2,500
Most people pay $800 to $2,500 through a dentist office. Here’s what that price gets you, separated into things that add value to the device and things that don’t.
Useful things you pay for at the dentist office:
The dentist’s diagnostic time, assessing whether your case is straightforward or complex
An in-office impression with professional technique
Multiple adjustment visits if the fit needs refinement
Articulator-verified occlusion at the lab (this part is the same across channels)
Coordination if your case needs related dental work (cleanings, extractions, crowns) first
Insurance billing handled by office staff
A single point of contact for follow-up issues
Things in that price that don’t make the device better:
Office rent and equipment depreciation
Front-desk and practice-management staff
The marketing budget the office runs to acquire patients
Profit margin layered on top of overhead
For a complex case (multiple missing teeth, periodontal issues, planned implants), the useful column above is genuinely worth what you pay. The dentist’s clinical judgment is the value. For a straightforward case, you’re paying $1,500 to $2,000 extra for the office layer to handle something the lab could deliver directly.
Where our pricing lands
Our partial denture lineup runs $299 to $549 starting price. That’s below the bottom of the typical $800 to $2,500 range, every product, every type.
We can sit there because we’re a lab. We pay the lab cost (material plus labor plus overhead) plus a small margin. We don’t add office overhead because we don’t have an office layer. Same fabrication, same materials, same FDA-cleared process, smaller bill.
What you get at our pricing:
The same lab-fabricated device a dentist office would order from a similar lab
Professional-grade FDA-approved materials, non-allergenic and BPA-free
Acrylic, nylon thermoplastic (Valplast/Duraflex), or cobalt-chromium framework depending on product
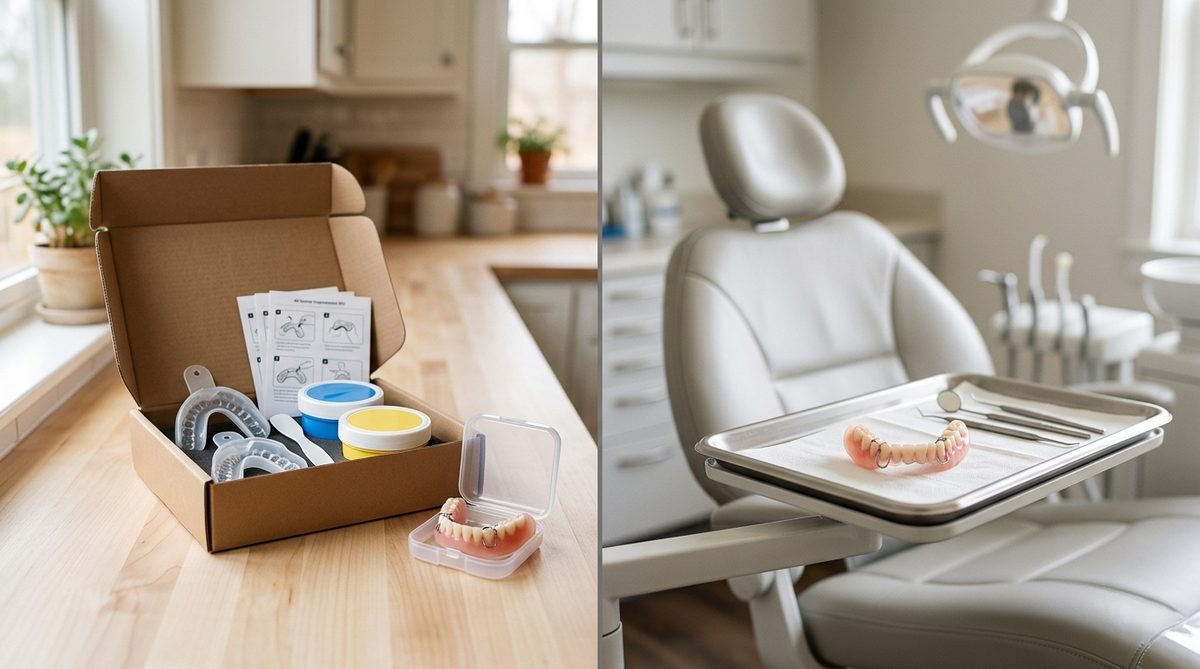
At-home impression kit with custom-fit trays, pre-measured putty, and a prepaid USPS return label
Free photo review of your impressions before you mail them back, so we catch issues before fabrication starts
30-day adjustment warranty (free adjustment or remake if the device doesn’t fit on delivery) plus a 60-day warranty on breakage
Phone and email support throughout the order
Made in coordination with licensed dentists
What you don’t get at our pricing:
In-office adjustment visits (we handle adjustments by mail or guide you through them on a call)
The dentist’s diagnostic time on your specific case
Insurance billed directly from us (many plans don’t reimburse lab-direct purchases without a dentist referral)
For complex cases, those in-office services are worth paying for. For straightforward cases, they’re often not.
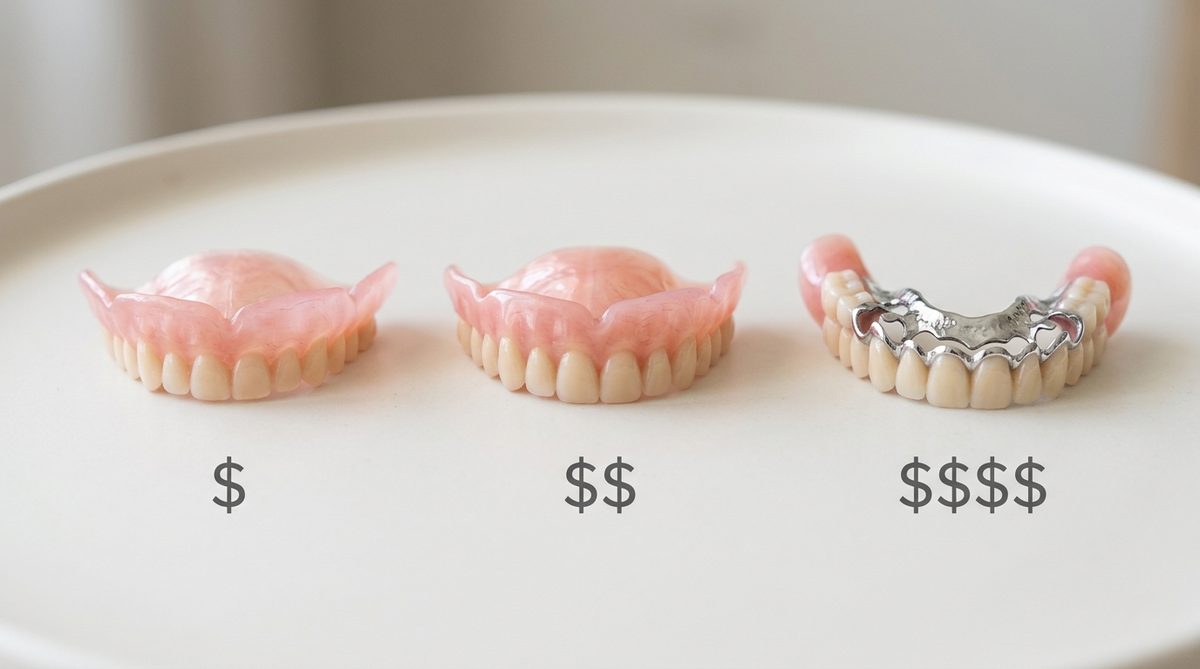
Three tiers of partial dentures, side by side
Browse our for per-product detail.
Does insurance cover partial dentures?
Most major dental plans cover partial dentures as a ‘major service.’ Typical terms [3]:
Coverage percentage: 40 to 60 percent after deductible. A $2,500 dentist-fitted partial against 50 percent coverage means you pay $1,250 out of pocket plus your deductible.
Annual maximum: $1,000 to $2,000. Coverage caps at the annual maximum. A $3,000 partial against a $1,500 cap means you pay $1,500+ regardless of the percentage covered.
Waiting period: 6 to 12 months for major services. Many plans won’t cover a partial during the first half-year of a new policy.
Medicare doesn’t cover dentures. Medicare Part B explicitly excludes routine dental care, including dentures [4]. Some Medicare Advantage plans include limited dental benefits. Check your specific plan.
Medicaid coverage varies by state. Some states cover partial dentures for adult Medicaid recipients; many don’t. Check your state’s Medicaid dental schedule.
ADA codes used for insurance billing: D5211 (maxillary resin base partial), D5212 (mandibular resin base partial), D5213 (maxillary cast metal partial), D5214 (mandibular cast metal partial) [5]. The dentist office submits these codes. Lab-direct sellers typically don’t bill insurance directly.
HSA / FSA funds. Lab-direct purchases often qualify for HSA or FSA reimbursement. Save your receipt and check with your plan administrator.
A note on lab-direct purchases and insurance. Some lab-direct sellers (us included) don’t bill insurance directly, but many partial dentures qualify as out-of-network ‘major services,’ which means your plan may reimburse you after you submit a receipt. We can provide documentation that supports your reimbursement claim. HSA and FSA funds typically apply directly at checkout.
Financing without insurance
Even without insurance, partial dentures can be financed:
Pay-in-4 (Klarna, Partial.ly, Afterpay). Lab-direct sellers commonly offer multiple options. We offer all three, interest-free, no credit check. Our partials run from four payments of $74.75 (Essix retainer at $299 total) to $137.25 (flexible partial at $549 total).
CareCredit and similar dental financing. 6 to 24 month no-interest if paid in full within the promotional period. Available at most dentist offices and at some lab-direct sellers.
Dental school clinics. Supervised students make partials at 20 to 40 percent below office pricing. Longer turnaround and multiple visits, but real savings if you’re flexible on timing.
Community health centers (FQHCs). Sliding-scale fees based on income. Available in most US counties.
The honest carve-out: financing turns a one-time cost into a monthly cost. Make sure the monthly fits your budget before signing.
What to do next, based on your situation
Five common situations. Pick the one that fits you.
Budget is tight and you need a partial denture soon. Lab-direct DTC is the best price-to-quality tier. Our acrylic partial at $449 or Essix retainer at $299 hits the lowest cost point that still meets fabrication quality standards. Boil-and-bite kits are fine only for temporary placement.
You have dental insurance with strong coverage. Run the math both ways. A $2,500 in-office partial with 60 percent coverage leaves you paying $1,000 out of pocket plus deductible. A $549 lab-direct partial paid out of pocket leaves you paying $549. Lab-direct often still wins on net cost even when insurance is involved.
You have a complex case (multiple missing teeth, severe periodontal disease, planned implants, monomer allergy). Dentist-fitted is the right tier. The clinical time and adjustment visits are the value, not the device itself. Don’t optimize for sticker price on a case where the office services do real work.
You’ve been quoted $4,000+ at a single dentist office for a simple partial. Get a second quote. Lab-direct or denture-chain pricing should be a fraction. If your case really is complex, the higher price is justified. A second opinion costs you nothing and could save you thousands.
You’re paying out of pocket and want the cheapest custom option. Our Essix retainer partial at $299 or Nesbit at $399. Both are lab-fabricated from custom impressions. Below the typical range floor, with the same material grade you’d find at the office.
Still mapping your situation to one of these five?
If your case sits between scenarios or if you have a quote you want to sanity-check, our team can walk through the cost math with you. We’ve audited thousands of partial denture quotes over 25 years. Sometimes the answer is ‘yes, the dentist’s price is justified for your case.’ Sometimes it’s ‘you’re paying $3,000 for what should cost $600.’ Reach us at 1-888-591-2220 or via the .
FAQ
How much do partial dentures cost without insurance?
Without insurance, partial dentures cost $300 to $5,000+ per arch. Most people pay $800 to $2,500 through a dentist office. Lab-direct sellers start at $299 and stay below the typical range. Your exact out-of-pocket cost depends on material, complexity, and channel.
Is a $500 partial denture as good as a $3,000 one?
The lab-fabricated device usually is. The same materials and process produce a partial whether it ships through an office or direct. The $2,500 difference goes to office overhead (chair time, rent, staff, marketing) and the dentist’s clinical time. For straightforward cases, the device quality is identical. For complex cases, the dentist’s time adds value the device alone doesn’t.
How much do partial dentures cost for just one tooth?
Single-tooth partials (Nesbit unilateral, flipper) typically cost $300 to $700 at the lab-direct tier and $800 to $1,500 at a dentist office. Our Nesbit flexible partial starts at $399.
Does Medicare cover partial dentures?
Medicare Part B doesn’t cover routine dental, including partial dentures [4]. Some Medicare Advantage plans (Part C) include limited dental benefits and may partially cover partials. Check your plan. If your only coverage is Medicare Part B, you’ll pay out of pocket.
Why does my dentist’s price differ so much from online prices?
Office overhead. The lab that fabricates the device is often the same across channels. The dentist office adds chair time, clinical staff, rent, equipment, and office management on top of the lab cost. Lab-direct sellers skip those layers. The price gap reflects the overhead difference, not necessarily a quality difference in the device itself.
How long should a partial denture last to make the cost worth it?
A quality lab-fabricated partial denture should last 5 to 8 years before relining or replacement [2]. Cast cobalt-chromium framework partials can last 10+ years. At our pricing ($299 to $549), the cost-per-year for a 5-year lifespan is $60 to $110. At dentist-office pricing ($1,500 to $4,000), the cost-per-year is $300 to $800. Material grade matters more than channel for the long-term cost math.
25+ years as a . Professional-grade FDA-approved materials. Custom-made at our US dental lab. Made in coordination with licensed dentists. 1,000+ verified reviews. 60-day warranty on all custom-made products.
If you’re ready for a partial denture that costs less than the typical range
Order online. Your at-home impression kit ships in days with custom-fit trays, pre-measured putty, step-by-step instructions, and a prepaid USPS return label. Submit a photo of your impressions for free review before you send them back. The custom partial denture is then crafted at our US dental lab over 3 to 4 weeks. Every order includes a 30-day adjustment warranty (free adjustment or free remake if the device doesn’t fit on delivery) and a 60-day warranty on breakage (covering cracks, fractures, or denture tooth loss).
Real cost. Real device. Real lab.
Sources
[1] American Dental Association. 2022 Survey of Dental Fees (final edition; the survey was discontinued in 2023). National average fees for prosthodontic procedures, including ADA codes D5211-D5214 (resin and cast metal partial dentures).
[2] ISO 20795-1:2013. Dentistry, Base polymers, Part 1: Denture base polymers. International standard specifying mechanical, biological, and processing requirements for PMMA denture base materials.
[3] National Association of Dental Plans (NADP). Dental benefits coverage data including typical coverage percentages, annual maximums, and waiting periods for major services.
[4] Centers for Medicare and Medicaid Services (CMS). Medicare coverage of dental services. Medicare.gov policy excluding routine dental from Part B coverage.
[5] American Dental Association. Current Dental Terminology (CDT) codes: D5211, D5212, D5213, D5214. Reference for insurance billing.
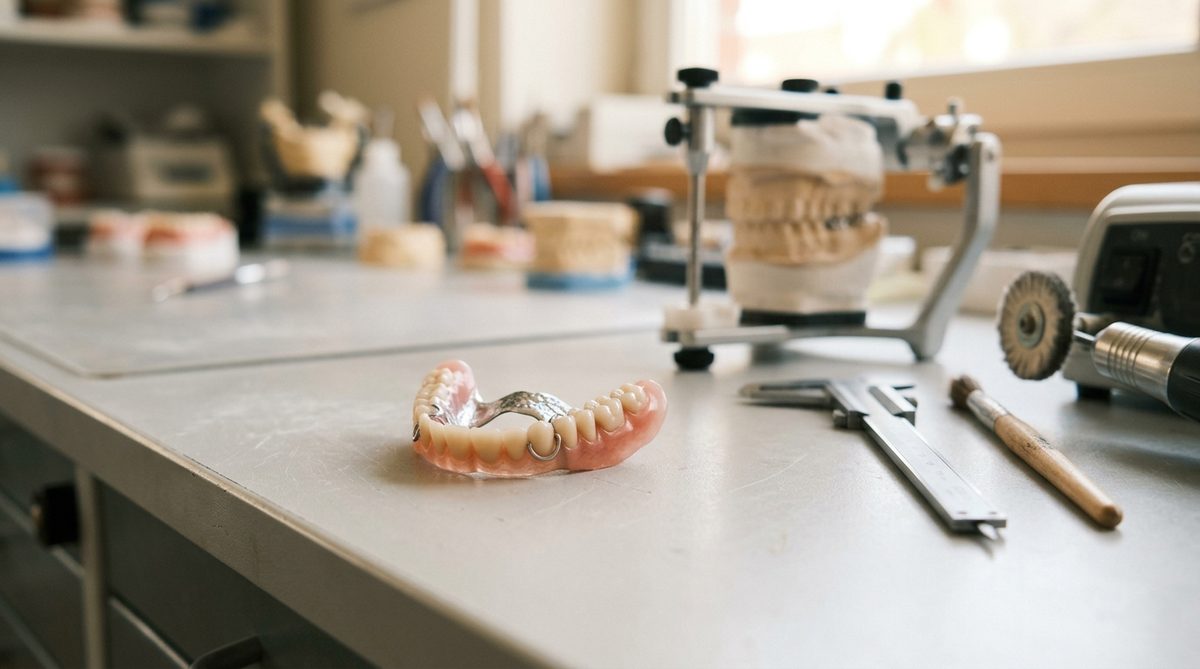
The best partial dentures aren’t a brand. They’re a device that meets five measurable quality criteria: material spec, dimensional fit, finish and polish, occlusion calibration, and manufacturing transparency.
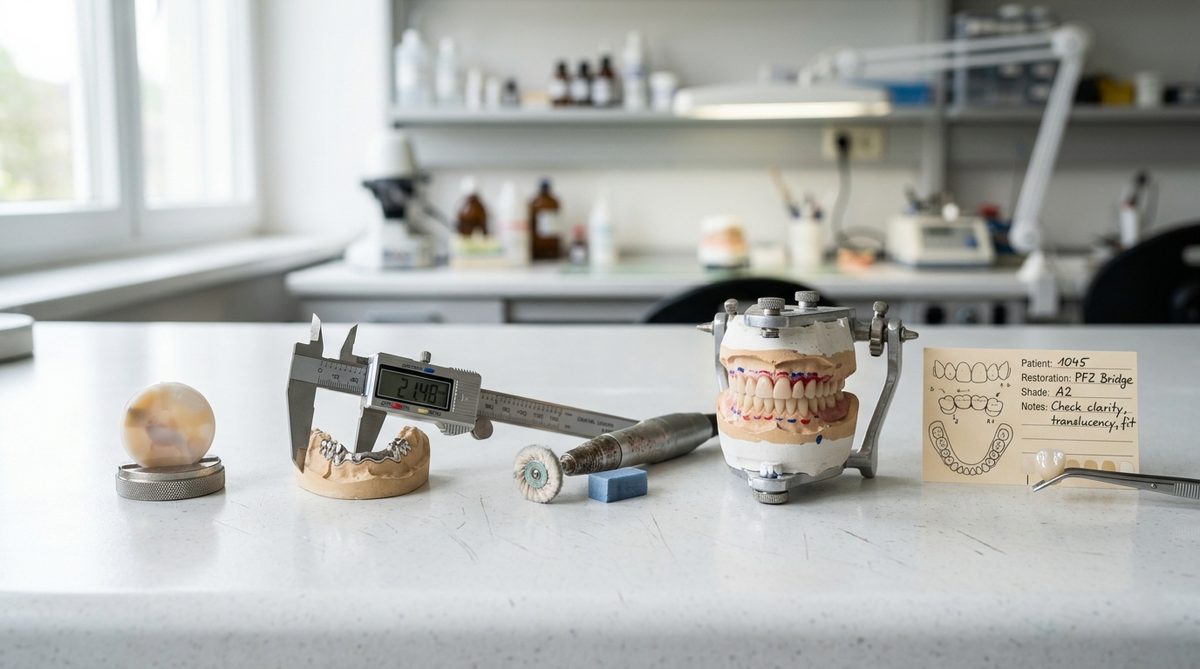
ISO 20795-1:2013 is the international standard for denture base polymers. It sets exact limits on residual monomer, sorption, solubility, and flexural strength. A partial denture that misses these limits usually shows it within 6 to 12 months of wear.
A quality partial denture should last 5 to 8 years. Acrylic at the lower end of the range, cast cobalt-chromium at the higher end. If yours fails inside a year, the issue is almost always manufacturing-side.
Most “best partial dentures” articles compare three types and then punt the decision to your dentist. None of them tell you how to evaluate the actual fabrication.
FDA-registered manufacturing is required for Class II removable partial dentures. Any seller should be able to name their registration and material specs on request.
The honest carve-out: complex cases (severe periodontal disease, planned implant work, known monomer allergies) sometimes need a dentist-fitted route, not direct-from-lab. We say so when that applies.
What “best” actually means when you cut through the explainers
You’ve narrowed it down to a partial denture. Maybe you’re shopping for the first time. Maybe your old one is failing and you’re hoping the next one will be different.
Most articles you’ll find about the best partial dentures explain the three main types (cast metal, flexible, acrylic) and then send you to your dentist. That’s not wrong, but it skips the part you actually need: how to evaluate whether the partial denture you end up with is well made.
Brands don’t make partial dentures. Labs do. The brand on your packaging might be a dentist’s office, a direct-to-consumer e-commerce site, or a national denture chain, but the device itself was fabricated at a dental lab. What matters is whether that lab follows the manufacturing standards that determine whether the device works for five years or starts failing in twelve months.
So what are the best partial dentures when you cut through the explainers? Not a brand. A partial denture either meets five measurable criteria or it doesn’t, and the brand is downstream of that.
We’re a US dental lab. We’ve been fabricating partial dentures for 25+ years. The five criteria below are what we’d use if we were buying one ourselves.
The 5 criteria for evaluating partial dentures
What are the best partial dentures? Not a single product. There are five quality criteria a partial denture either meets or doesn’t, regardless of who’s selling it. Run any partial denture you’re considering, or one you already own, against this checklist.
Criterion 1: Material specification
What it is: ISO 20795-1:2013 sets measurable limits for denture base polymers. Sorption below 32 μg/mm³, solubility below 1.6 μg/mm³, residual monomer at or under 2.2% for heat-cured PMMA and 4.5% for self-cured, flexural strength at or above 65 MPa for most type ratings [1].
Why it matters: Residual monomer is the unpolymerized acrylic that leaches into your mouth from incompletely cured material. Sorption and solubility govern how much saliva the device absorbs. More absorption means a bacterial harbor, dimensional change, and odor over months.
How to evaluate: Ask the seller what material grade they use, and look for a specific answer rather than a generic one. A reputable seller can tell you whether their flexible partials use Valplast, Duraflex, or another nylon thermoplastic, whether their acrylic partials are heat-cured or self-cured, and where the framework metal comes from. If you don’t see the specifics on a product page, ask their support team directly. Labs that know their process can answer this in one email.
The three material categories you’ll encounter:
Heat-cured PMMA acrylic. The gold standard for acrylic partials. Higher density, lower residual monomer, longer service life. Used for the base plate of most quality partial dentures.
Flexible nylon thermoplastics (Valplast, Duraflex, TCS). Metal-free, hypoallergenic, gum-toned. No visible clasps. More comfortable for most wearers, slightly less durable than cast metal but lasts 5+ years with care.
Cast cobalt-chromium framework. The strongest option. Thin profile (3 to 4 millimeters at the major connector), 10+ year lifespan, supports complex multi-tooth replacements. Visible metal clasps in most designs.
The catch: Self-cured (cold-cure) acrylic is the cheap, fast process. It’s legal and FDA-cleared, but it sits at the higher residual monomer ceiling and the device won’t last as long. Heat-cured PMMA is the higher-quality default and what reputable labs use for non-rush work.
Criterion 2: Dimensional fit and stability
What it is: How accurately the finished denture matches your intraoral anatomy, and how well it holds that geometry over time.
Why it matters: Heat-cured PMMA shrinks 0.2% to 0.6% by volume during polymerization [2]. A lab that doesn’t control packing pressure and cooling rate produces a denture that’s a few hundred microns off your impression. You feel it as rocking, sore spots, food trap, or progressive looseness within weeks.
How to evaluate before buying: Ask whether impressions are taken in office or with an at-home kit, and whether the lab does a try-in or bite verification step. A lab that uses an articulator-verified occlusion process is doing more than a lab that ships from a single impression.
How to evaluate after delivery: Does the denture seat passively without finger pressure? Does it rock when you push on one side? Are sore spots showing up in the same place repeatedly after the two-week break-in period?
Four concrete signs of a fit failure (not normal break-in):
Persistent rocking when you push laterally on one side
Sore spots that appear in the same location after the two-week adaptation period
Food packing under the same area at every meal
Audible clicking when you talk or eat
The catch: Even a perfectly fabricated denture needs a two to three week adaptation period. Normal break-in means gradual reduction in awareness with occasional sore spots that move. A poorly-fitting denture means persistent rocking, sore spots in the same spot, and food packing that doesn’t improve.
Criterion 3: Finish, polish, and porosity
What it is: The tissue-facing surface (the side against your gum) should be smooth, without pits, voids, or unfinished acrylic. The polished exterior should be uniformly glossy.
Why it matters: Surface porosity is where bacteria, Candida, and food debris colonize. ADA clinical assessment criteria for removable prosthodontics specifically evaluate finish, porosity, tissue surface, and polish quality as quality indicators [3]. A porous tissue surface is the most common cause of denture stomatitis, the mouth infection that doesn’t get much consumer-facing coverage.
How to evaluate: Hold the device under bright light. The tissue-facing surface should look like one continuous matte-smooth plane. Visible pinholes, rough patches, or unfinished trim are quality failures. The polished side should reflect light evenly.
The catch: Some new dentures have a faint chemical smell from residual monomer. That fades over one to two weeks of soaking and normal use. A persistent stale smell after a month is usually a porosity problem, not a hygiene problem.
Criterion 4: Occlusion calibration
What it is: Bilateral balanced contact between your partial denture’s teeth and your opposing arch, with proper vertical dimension and no premature contact points.
Why it matters: A partial with one premature contact loads that tooth disproportionately. You’ll feel it as tooth pain, accelerated wear on the natural opposing tooth, headaches from clenching to avoid the contact, and (over years) bone loss around the loaded abutment teeth.
How to evaluate: Bite down evenly. The contact should feel even left to right and front to back. Articulating paper (the colored thin tape your dentist uses) leaves even marks across all opposing teeth, not one dark spot. If you find yourself shifting your jaw to avoid a high spot, the occlusion needs adjustment.
The catch: A small bite-off is normal on a brand-new partial. A one or two visit adjustment to refine occlusal contacts is part of any quality fitting protocol. It’s not a quality failure. What is a quality failure is a denture that arrives without articulator-verified occlusion in the first place.
Criterion 5: Manufacturing transparency
What it is: Can the seller name where the device is made, what materials are used, what FDA registration applies, and what certifications the lab holds?
Why it matters: Partial dentures are FDA Class II medical devices, Product Code EBO (removable partial dentures) [4]. Any US-shipped device must come from an FDA-registered facility. NADL (National Association of Dental Laboratories) certification and DAMAS (Dental Appliance Manufacturers Audit Scheme) are voluntary but indicate documented quality management systems [5]. A lab unwilling to disclose any of this is a red flag.
How to evaluate: Look for FDA registration on the lab’s website or packaging. Ask whether the lab is NADL-certified or DAMAS-audited. Ask where the device is physically fabricated. “Made in USA” is a meaningful claim because offshore labs often lack FDA registration and aren’t subject to the same audit requirements.
The catch: Not every reputable lab is NADL or DAMAS certified. The audit and certification cost is real, and skipping the voluntary credentials doesn’t mean a lab is bad. But FDA registration is non-optional, and any US-selling lab that won’t disclose theirs is operating outside the regulation.
Three tiers of partial dentures, side by side
If you want to and compare across material categories, the product category page is the cleanest off-ramp. The table below is the tier-level view.
The lab-side answer most “best partial dentures” articles don’t give you
Here’s what most explainers won’t say out loud.
The same lab often fabricates partial dentures for multiple sales channels. A dentist’s office, a DTC site, a small denture chain. Same equipment. Same technicians. Same FDA-registered facility. The device that ships to each channel can be materially identical.
The cost difference between channels isn’t material cost or manufacturing process. It’s overhead. Office rent, chair time, practice management, the dentist’s time during the fitting appointment. Those are all real costs that real patients sometimes need. A complex prosthodontic case with multiple abutment teeth, severe periodontal disease, or planned implant integration is worth paying for in-office, because the dentist’s diagnostic and adjustment time is the value.
For a straightforward partial denture replacement case (stable mouth, clear impression, no complicating factors), the device-only cost from a lab-direct seller buys you the same fabrication without the office overhead. That’s the underlying logic of the DTC custom tier.
This isn’t an attack on dental offices. It’s the reason the DTC tier exists, and why understanding the five criteria above lets you evaluate quality independent of where you buy.
What to do next, based on your situation
Five common situations. Pick the one that fits you.
You’re shopping for a partial denture for the first time and don’t have one to compare. Run the five criteria as a buyer’s checklist before you commit to any seller. Ask the seller to name material spec, fabrication process, FDA registration, and impression method. If they can’t answer specifically, move on. Don’t fall for “FDA-approved acrylic” with no further detail.
You have a partial denture now and it’s slipping, rocking, or developing sore spots after the break-in period. This is usually a dimensional fit issue (Criterion 2). Reseating, relining, or remaking from a new impression is the standard fix. If your current denture is under 12 months old, the lab should remake it under their warranty.
Your partial denture cracked, warped, or developed surface roughness within the first year. This is a material spec issue (Criterion 1) or porosity issue (Criterion 3). It usually means the device wasn’t fabricated to ISO 20795-1 limits. Replacement, not repair, is the right answer.
You’re considering a $50 to $200 boil-and-bite or no-impression online partial. It’s fine for temporary use. It will not meet any of the five criteria. Don’t expect more than 6 to 18 months of wear. If you need long-term function, the DTC custom tier is where the value lives.
You have a complex case (multiple missing teeth across both arches, severe periodontal disease, planned implant work, or a known monomer allergy). The DTC custom tier may not be your right answer. A prosthodontist or implant-trained dentist who can plan the full restoration belongs in the loop. Tell us if this is you and we’ll often recommend you don’t order from us.
Still mapping your situation to one of these five?
If your case sits between the scenarios above, or if you have a partial denture now that you’re not sure passes the five criteria, our team can run through the checklist with you on a call. We’ve spent 25 years auditing partial dentures, including ones we didn’t make. Sometimes the answer is “yes, get a new one from us.” Sometimes it’s “no, take this back to whoever fabricated it.” Reach us at 1-888-591-2220 or via the .
FAQ
How long should a quality partial denture last?
A well-made partial denture that meets ISO 20795-1 material specs typically lasts 5 to 8 years before relining or replacement is needed. Cast cobalt-chromium frameworks can last 10+ years. Acrylic-only partials sit at the lower end. If yours fails before 12 months, the device almost certainly didn’t meet the manufacturing spec.
How do I know if my partial denture is poorly made?
Run it against the five criteria above. Concrete signs of a quality failure: persistent sore spots in the same place after the two-week break-in, visible pinholes or rough patches on the tissue surface, a persistent stale smell that doesn’t fade with cleaning, audible clicking from poor occlusion, and visible warping or color shift within the first year.
Are online partial dentures lower quality than dentist-made ones?
Not inherently. Both come from labs. The question is which lab and which process. A DTC custom partial denture from a reputable US dental lab using professional-grade, FDA-approved materials is materially identical to a dentist-fitted partial from the same kind of lab. The cost gap is overhead, not quality. To verify any online seller, ask them five questions: what materials they use, where their lab is located, what their warranty covers, how they handle fit issues, and how long they’ve been making partial dentures. Sellers who know their process answer those quickly.
What materials are used in the best partial dentures?
Cast cobalt-chromium framework is longest-lasting and thinnest, ideal for complex multi-tooth cases. Heat-cured PMMA acrylic is the gold standard for acrylic partials and must meet ISO 20795-1 thresholds. Nylon-based thermoplastics like Valplast and Duraflex are flexible, metal-free, and hypoallergenic. The choice between them depends on case complexity, aesthetic priority, and budget. There’s no universally best material; there’s a best-fit material for your situation.
Can I evaluate a partial denture before I buy it?
You can evaluate the seller’s process: ask about materials, fabrication location, impression method, warranty terms, and how they handle fit issues. You can’t evaluate the physical device until it arrives. Reputable sellers stand behind their warranty if anything’s off on delivery. Our partial dentures come with a 60-day warranty on all custom-made products. If the device doesn’t fit or meet expectations when it arrives, contact us and we’ll work with you on it.
What’s the most comfortable type of partial denture?
Flexible partial dentures (Valplast, Duraflex, and similar nylon-based thermoplastics) are typically rated most comfortable by wearers because they have no metal clasps and adapt to mouth contours. Cast metal partials are thinner and stronger but feel more rigid. Acrylic-only partials sit in between. Comfort also depends heavily on Criterion 2 (fit) and Criterion 4 (occlusion), so a well-made acrylic can be more comfortable than a poorly-made flexible.
25+ years as a . Professional-grade FDA-approved materials, non-allergenic and BPA-free. Custom-made at our dental lab. 1,000+ verified reviews. 60-day warranty on all custom-made products.
If you’re ready for a partial denture that meets all five criteria
Order online. Your at-home impression kit ships in days with custom-fit trays, pre-measured putty, step-by-step instructions, and a prepaid USPS return label. Submit a photo of your impressions for free review before you send them back. The custom partial denture is then crafted at our dental lab over 3 to 4 weeks. It ships with a 60-day warranty on all custom-made products. If anything’s off when it arrives, contact us and we’ll make it right.
Real materials. Real fit. Real lab.
Sources
[1] ISO 20795-1:2013. Dentistry, Base polymers, Part 1: Denture base polymers. International standard specifying mechanical, biological, and processing requirements for PMMA denture base materials.
[2] Polymeric Denture Base Materials: A Review. Polymers (Basel), 2023 (PMC). Covers volumetric shrinkage, sorption, and processing variables for PMMA denture bases.
[3] American Dental Association. Clinical assessment criteria for removable prosthodontics. Covers finish, porosity, tissue surface, polish, and occlusal quality as quality indicators.
[4] FDA Product Classification Database. Product Code EBO: Denture, Partial, Removable. Class II medical device.
[5] National Association of Dental Laboratories. Certified Dental Laboratory (CDL) program. Voluntary lab certification covering quality systems, materials traceability, and regulatory compliance.
Partial dentures replace some of your missing teeth, not all of them, by clipping onto the natural teeth you still have.
The main removable types are flexible, acrylic flipper, single-tooth, and clear Essix, each suited to a different gap and budget.
They do real work: restore chewing and speech, and stop your remaining teeth from drifting into the gap.
Missing just one tooth? A single tooth denture is a fast, low-cost way to fill it without surgery.
Direct-to-you partials run $299 to $549, versus roughly $800 to $2,500 at a dentist’s office [4].
They last a few years to over a decade depending on the type, and they are not a fix for an arch with no teeth left, that calls for full dentures.
Missing a few teeth? Start here
Losing a tooth or two changes more than your smile. The gap lets neighboring teeth drift, makes chewing harder, and can even shift your bite over time [1]. Partial dentures are the simplest, most affordable way to fill that gap, and you do not need surgery or a wall of dental bills to get them.
Here’s the part most pages skip: partial dentures is not one thing. There are several types, and the right one depends on how many teeth you are replacing and what you care about, cost, comfort, or how natural it looks. This guide walks through what partial dentures are, the types, what they cost, and how to choose, including the single-tooth case.
Find the partial that fits your gap.
Dental Lab Direct ships custom flexible, acrylic, single-tooth, and clear partial dentures directly from our lab — no dentist visit. From $299, delivered in about 3–4 weeks.
A partial denture is a removable appliance that replaces one or more missing teeth while you still have some natural teeth left [1]. It has a gum-colored base that holds the replacement teeth, and it stays put with clasps or attachments that grip your remaining teeth, a bit like a retainer [2].
Beyond filling the gap, a good partial does three jobs: it restores your ability to chew, it helps you speak clearly, and it keeps your other teeth from shifting into the empty space [1]. That last one matters more than people expect, since drifting teeth can cause bite and alignment problems down the line.
The types of partial dentures
When people say partial dentures, they could mean any of these. Here is how they compare, including what we offer and what we do not.
Type
Best for
Removable?
Our price
Typical at a dentist
Clear Essix retainer
1 to 4 teeth, temporary or cosmetic
Yes
$299
varies
Single-tooth (Nesbit)
1 to 2 teeth on one side
Yes
$399
$300 to $500
Acrylic flipper
a few teeth, economical or interim
Yes
$449
$1,000 to $1,800 [4]
Flexible
several teeth, comfortable, metal-free
Yes
$549
$1,100 to $1,700 [4]
Cast metal
maximum stability
Yes
not offered
$2,000 to $2,500 [4]
Bridge or implant
a permanent fix
No
not offered
dentist procedure
The short version: flexible partials are the most comfortable and natural-looking removable option, acrylic flippers are the budget pick and often used as a temporary set, and a clear Essix is a lightweight, mostly cosmetic option that does not fully restore chewing. Cast metal and implants exist too, but those are dentist-office routes.
Missing just one tooth? Your single-tooth options
You do not need a big appliance to fill one gap. A single tooth denture, often a Nesbit flipper, is a small, removable piece that fills one or two missing teeth on one side of your mouth.
Do not be tempted to leave a single gap alone, even a back one. A missing tooth invites the neighbors to lean in, can lead to bone loss, and makes chewing uneven [1]. For one tooth, you really have two paths:
A single tooth denture (flipper): removable, non-invasive, affordable, and ready in weeks. The trade-off is that it is not built to last decades and needs cleaning like a retainer.
A dental implant: a permanent, surgical option that functions like a natural tooth. It lasts the longest, but it costs the most and means oral surgery at a dentist [1].
If you want fast and affordable, a single tooth denture is the easy starting point. If you want permanent and you have the budget, an implant is the long-term play.
Partial dentures vs implants vs bridges
All three replace missing teeth, but they are very different commitments.
Partial dentures: removable, affordable, no surgery. You take them out to clean and sleep. Best when you want to restore a few teeth without a big investment.
Bridges: fixed in place by crowning the teeth on either side of the gap. Natural-feeling, but permanent and they alter healthy neighboring teeth.
Implants: the most natural and longest-lasting, anchored into the jaw with surgery, and the most expensive [1].
Bridges and implants are dentist procedures. Partials are the route you can do from home.
What partial dentures cost
Price depends on the type, the number of teeth, and where you get them. At a dentist’s office, partials typically run $800 to $2,500 depending on type, with cast metal at the high end and simpler acrylic lower, and complex cases can run higher [4]. Ordered direct from a lab, the same removable partials run $299 to $549, because you skip the office overhead. One thing to plan for: insurance coverage for dentures varies, and many plans cover only part of it.
Who partial dentures are for (and who needs something else)
Partial dentures are a strong fit if you are missing some teeth but still have healthy natural teeth for the clasps to hold onto [2]. They are not the answer in a few cases:
If you have no teeth left in an arch: you need full dentures, not a partial.
If you want a permanent, no-maintenance fix: an implant or bridge at a dentist is the better match.
If you only need a temporary or cosmetic cover: a clear Essix works, but know it does not fully restore chewing.
If you have untreated decay or gum disease: treat that first, since a partial clasps onto teeth that need to be healthy.
Plainly: a partial denture restores function affordably, but it is not a treatment for an unhealthy mouth, and it is not forever.
Caring for your partials
Treat them like teeth you can take out. Rinse them after meals, brush them daily with a soft denture brush and a non-abrasive cleanser (not regular toothpaste), and soak them so they do not dry out [3]. Take them out at night to give your gums a rest. Over time your mouth changes shape, so expect to refit or replace them every few years.
What to do next, based on your situation
If you are missing one tooth on a budget: a single tooth denture (the Nesbit flipper, from $399) fills it fast.
If you are missing several teeth: a flexible or acrylic partial restores the row; flexible is comfier, acrylic is cheaper.
If you want the most natural, comfortable feel: go flexible, it is metal-free and gum-colored.
If you need a temporary fix while you heal or save up: a clear Essix partial (from $299) is the lightweight, low-cost option.
If you want it permanent: an implant or bridge is the route, and that is a dentist procedure, not something we offer. Be honest with yourself about the cost and the surgery.
FAQ
What is a partial denture?
A removable appliance that replaces one or more missing teeth and clips onto your remaining natural teeth, restoring chewing and keeping your other teeth from shifting [1].
What are partial dentures made of?
The base is gum-colored acrylic or a flexible nylon-type material, sometimes on a metal framework, with replacement teeth attached and clasps that grip your natural teeth [2].
How does a single tooth denture stay in?
A single tooth denture (flipper) uses small clasps or a snug custom fit against your gums and neighboring teeth to hold the replacement tooth in place. You take it out to clean it.
How much do partial dentures cost?
At a dentist, roughly $800 to $2,500 depending on type [4]. Ordered direct, removable partials run $299 to $549.
Partial denture vs implant vs bridge, what’s the difference?
A partial is removable and affordable with no surgery. A bridge is fixed and alters neighboring teeth. An implant is surgical, permanent, and the priciest [1].
How long do partial dentures last?
It depends on type: acrylic flippers a few years, flexible partials longer with good care. Your mouth changes shape over time, so plan to refit or replace eventually [2].
Can you eat and sleep with partial dentures?
You can eat with them, easing into firmer foods, but most people take them out at night so the gums can rest [3].
Fill the gap, keep the rest healthy
Partial dentures are the practical middle ground for missing teeth: more affordable than implants, less invasive than a bridge, and quick to get. Match the type to your gap, keep them clean, and they will restore your bite and your smile without the dentist-office price tag. When the gap is just one tooth, a single tooth denture gets you there for even less.
Buying partial dentures online can save 50 to 70 percent vs in-person, but the savings only translate to a good outcome for the right kind of case. For straightforward replacements (stable mouth, clear impression, no complicating factors), online is often the right move. For complex cases, in-person is genuinely worth the markup.
The ‘online vs in-person’ question is usually framed as a binary by content that benefits from one side winning. The honest framing is case-specific, with five criteria that determine which channel fits each reader’s situation.
Not all online sellers are equivalent. The three tiers (DIY boil-and-bite, reputable US lab-direct, offshore unverified) have very different quality and risk profiles. Articles that lump them together are usually selling you something.
ISO 20795-1 sets the international standard for denture base polymers regardless of where the device is fabricated. A partial denture meeting this spec lasts 5 to 8 years whether you bought it online or got it fitted in-office. Material grade matters more than channel for long-term outcomes.
The ‘hidden costs’ argument against online dentures has truth in it for the DIY tier, but is mostly false for the reputable lab-direct tier. We’ll walk through where the argument applies and where it doesn’t.
Honest carve-out: complex cases (multiple abutment teeth, severe periodontal disease, planned implants, known monomer allergies) often warrant in-person. We say so when that applies, and we say so when it doesn’t.
Why most ‘online vs in-person’ articles get this wrong
If you’ve been researching partial dentures, you’ve probably read both sides of this argument. Online sellers tell you it’s safe and saves you thousands. In-person clinics tell you it’s risky and causes permanent damage. Both can’t be right.
The reason both sides sound so confident is that most articles arguing for ‘online’ are written by online sellers, and most arguing for ‘in-person’ are written by in-person clinics. Whichever side publishes the article tends to win the conclusion.
This isn’t one of those articles.
We’re a US dental lab. We ship partial dentures directly to customers (the online lab-direct channel), and labs like ours supply dentist offices that fit dentures in-person. We see both sides every week. The honest answer is that whether to buy partial dentures online vs in-person is a case-specific decision. For some readers, lab-direct is clearly right. For others, in-person clearly is. The article below shows you which side fits your situation, with criteria you can apply yourself.
Here’s the comparison, broken down.
When buying in-person IS the right move
Let’s start with the cases where the in-person channel is genuinely better. These are real and worth taking seriously.
You’re a good fit for in-person if:
Your case is complex (multiple missing teeth across both arches, abutment teeth that need pre-treatment, planned implant work, bite reconstruction)
You have severe periodontal disease that affects your remaining teeth
You have a known acrylic or monomer allergy and need material screening before fabrication
You’re a first-time denture wearer with anxiety about the process, and you want hands-on guidance from a clinician
You want multiple in-office adjustment visits included in the price
Your insurance significantly subsidizes in-office work in a way that flips the cost math against the lab-direct discount
If two or more of those describe your situation, in-person is genuinely worth the markup. The dentist’s clinical time and diagnostic judgment is the value, not the device itself. A complex case run through a generic at-home impression kit can produce a denture that fits poorly because the underlying treatment plan needed more than impression accuracy.
This is the honest carve-out. We won’t pretend the lab-direct channel is universal. It isn’t.
When buying partial dentures online IS the right move
Now the cases where the lab-direct online channel is the right call.
You’re a good fit to buy partial dentures online if:
Your mouth is stable (no active periodontal disease, no planned extractions, abutment teeth in good condition)
The case is straightforward (replacing 1 to 3 teeth in a known location, no bite reconstruction needed)
You’ve worn dentures before and know what to expect during adjustment
You’re price-conscious and want fabrication quality without the office overhead built into in-person pricing
You’re in a geography without easy access to a denturist (rural, traveling, frequently relocating)
If three or more of those describe you, the lab-direct online route is often a 50 to 70 percent cost saving for the same fabricated device, without compromising quality. A straightforward partial denture replacement at a dentist office costs $1,500 to $4,000+ because the office layer adds chair time, rent, staff, and the dentist’s diagnostic time on top of the lab cost. For your case, the device that ships out of the lab is materially the same as what you’d get in-office.
This is where the lab-direct DTC channel earns its place.
How to tell which side you’re on (the 5-criteria self-check)
If the two sections above didn’t make the answer obvious, run yourself through this short self-check.
1. Case complexity: Simple (1 to 3 teeth, stable mouth)? Score one for online. Complex (multi-tooth, periodontal, bite reconstruction)? Score one for in-person.
2. Prior denture experience: Experienced wearer who knows the adaptation period? Score one for online. First-time wearer with anxiety or uncertainty? Score one for in-person.
3. Geographic access: Rural or limited access to a qualified denturist? Score one for online. Convenient access to a quality denturist you trust? Score one for in-person if you’d otherwise visit them.
4. Budget sensitivity: Paying out of pocket and price matters? Score one for online. Insurance covers in-office work at 60+ percent of major services and you’ll meet the deductible? Score one for in-person, the math may flip.
5. Comfort with self-impression: Comfortable following written instructions and submitting a photo for pre-fabrication review? Score one for online. Need hands-on guidance and worried about getting impressions right alone? Score one for in-person.
Three or more ‘online’ answers? The lab-direct DTC tier is your best fit.
Three or more ‘in-person’ answers? Visit a denturist.
Mixed (2-3 each)? Keep reading. The next sections cover what makes the lab-direct tier different from other online options, and the section after that breaks down the ‘hidden costs’ argument honestly.
Three tiers of online sellers (not all are the same)
This is the part most ‘online vs in-person’ articles skip. When critics warn against buying partial dentures online, they’re usually treating ‘online’ as one category. It isn’t. There are at least three distinct tiers, and the quality, risk, and outcomes vary dramatically.
Tier 1: DIY / boil-and-bite kits ($50 to $200)
Lower-grade thermoplastic, no custom impression, generic pre-formed flippers or boil-and-bite trays. Lasts 6 to 18 months. Best fit: short-term placeholder while you save for a real denture, or as a backup during travel. The ‘hidden costs’ criticism applies here most fairly. Fit is generic, materials are weaker, and downstream dental work to correct problems is a real risk if you wear one long-term.
One distinction to hold onto, because some sellers blur it deliberately: an at-home impression kit is not a DIY denture kit. With an impression kit, you take the mold and a dental lab fabricates the device. With a DIY kit, you assemble the device yourself out of whatever is in the box. The first is Tier 2. The second is Tier 1 at best, and it is what dentists are actually describing when they warn people away from ‘online dentures’.
Tier 2: Reputable US lab-direct ($299 to $900, us included)
Custom impression from an at-home kit (custom-fit trays, pre-measured putty, prepaid USPS return label, photo review service before fabrication starts), lab-fabricated at a US dental lab from professional-grade FDA-approved materials, non-allergenic and BPA-free. 30-day adjustment warranty (free adjustment or remake if the device doesn’t fit on delivery) plus a 60-day warranty on breakage. 5 to 8 year lifespan, materially identical fabrication to what dentist offices order from labs like ours.
This is the tier where lab-direct earns its place. The fabrication quality matches in-office work because it IS in-office-quality work, minus the office overhead. Our partial denture lineup runs $299 (Essix retainer) to $549 (flexible partial), with Klarna, Partial.ly, and Afterpay interest-free payment plans.
Tier 3: Offshore / unverified online ($100 to $500)
Often non-US labs, no FDA registration disclosure, no clear warranty structure, no impression review service. Quality is variable. Some land fine, some fail within months. The lifecycle math doesn’t favor this tier because the savings vs Tier 2 are small (a couple hundred dollars at most), and the risk premium is real.
When you read articles claiming ‘all online partial dentures cause permanent damage,’ they’re usually pointing at Tier 1 or Tier 3 problems and pretending Tier 2 doesn’t exist. Most lab-direct customers we serve buy Tier 2 specifically because the quality is identical to what their dentist would order from a lab like ours.
The ‘hidden costs’ argument, examined honestly
Some articles claim buying partial dentures online creates $5,000+ in hidden costs from jaw damage, accelerated tooth loss, and emergency dental work. The argument deserves an honest reply rather than dismissal.
True for Tier 1 (DIY) and Tier 3 (offshore): ill-fitting devices, lower-grade materials, no real warranty, no fit recourse. The downstream cost chain (extractions, gum treatment, replacement dentures, emergency visits) is real if you wear a poorly-fitting device long-term. The fear-based articles are pointing at real risks at these tiers.
Mostly false for Tier 2 (reputable lab-direct): the custom-impression process delivers fit quality comparable to dentist-fitted because it’s the same lab process. Professional-grade FDA-approved materials match what dentist offices receive from their labs. The pre-fabrication photo review service (we offer this, and reputable competitors do too) catches impression problems before fabrication starts, which closes most of the fit-risk gap. Fit warranties cover delivery-stage issues.
On the ‘permanent jaw damage’ claim: the underlying biology is real. Ill-fitting dentures of any kind can cause bone resorption over years. But the cause is fit quality, not channel. An ill-fitting in-office partial causes the same damage. The argument is fundamentally about fit, not online vs in-person.
Net read: if you buy partial dentures online at Tier 2 from a reputable seller with a real fit warranty, the ‘hidden cost’ concern reduces to the same fit-quality risk every denture wearer faces, regardless of where they bought. If you buy at Tier 1 or Tier 3, the argument applies and you should think twice.
Want a partial denture from a US lab that ships nationally? Our partial dentures are crafted at our US dental lab from professional-grade FDA-approved materials, non-allergenic and BPA-free. Custom impression from an at-home kit with custom-fit trays, pre-measured putty, and a prepaid USPS return label. Submit a photo of your impressions for free review before you mail them back. Every order includes a 30-day adjustment warranty and a 60-day warranty on breakage. Starting at $299 (Essix retainer) to $549 (flexible partial). Klarna, Partial.ly, and Afterpay, four payments interest-free. Typical turnaround 3 to 4 weeks from impression to delivery. View our partial denture lineup →
What to do next, based on your situation
Five common situations. Pick the one that fits you.
You scored 3+ ‘online’ answers and want to move forward. Order from a Tier 2 seller, US FDA-registered lab, ISO 20795-1 materials, real fit warranty. Our lineup starts at $299 with the Essix retainer partial.
For most readers in this category, the flexible partial at $549 is the best balance of comfort, durability, and aesthetics.
You scored 3+ ‘in-person’ answers. Visit a denturist or prosthodontist in your area. The clinical time and adjustment visits are worth the markup for your case. Don’t optimize for sticker price on a case where the office services do real work.
You scored mixed (2-3 each). This is the gray zone where the choice is closer. Call us at 1-888-591-2220. We’ll help you figure out which tier actually fits without trying to sell you something inappropriate. Sometimes the answer we give is ‘visit a denturist, this isn’t a fit for us.’
You’ve been considering a Tier 1 DIY boil-and-bite kit to save money. Don’t, except as a temporary placeholder. The Tier 2 lab-direct option starting at $299 is the lowest reasonable cost floor that still delivers the fabrication quality you need for daily wear over 5+ years.
You’ve been quoted $3,000+ at a single dentist office for what sounds like a simple case. Get a second quote and compare to Tier 2 lab-direct pricing. If your case is straightforward, you’re paying for office overhead. If it’s complex per the self-check above, the markup is justified.
Still mapping your situation to one of these five?
If your case sits between scenarios after the self-check, our team can walk through it with you on a call. We’re a US dental lab that ships nationally, so we have an obvious bias toward selling you a partial denture, but we’ve made enough complex cases over 25 years to recognize when in-person is the better path. Sometimes we’ll tell you to visit a denturist instead. Reach us at 1-888-591-2220 or via the contact page.
FAQ
Is buying partial dentures online safe?
It depends on which tier you buy from. Tier 2 lab-direct sellers (US FDA-registered, ISO 20795-1 materials, real fit warranty) deliver the same fabricated device a dentist office would order from a similar lab. Tier 1 (DIY) and Tier 3 (offshore) have real safety concerns we covered above. Most ‘is buying partial dentures online safe’ questions are really asking about Tier 2 specifically.
Do online partial dentures fit as well as in-person ones?
When ordered from Tier 2 with a custom-impression kit and photo review service, yes. Fit is comparable to a dentist-fitted partial because the same lab process applies. Tier 1 and Tier 3 fit is variable. The fit quality gap isn’t between online and in-person broadly; it’s between custom-impression-with-photo-review (Tier 2 + in-person) and everything else (Tier 1 + Tier 3).
Why are partial dentures online cheaper than dentist-office prices?
Office overhead. The lab that fabricates the device is often the same across channels. The dentist office adds chair time, clinical staff, rent, equipment, and management on top of the lab cost. Lab-direct sellers skip those layers. For straightforward cases, the overhead doesn’t add value to the device itself. For complex cases, it does.
Can I get insurance to cover partial dentures bought online?
Some plans reimburse out-of-network lab-direct purchases at major-services percentages (typically 40 to 60 percent after deductible) [2]. We don’t bill insurance directly, but HSA and FSA funds typically apply at checkout, and we can provide documentation that supports your reimbursement claim. If insurance is a major factor in your decision, get a written estimate from your plan before ordering.
What happens if I buy partial dentures online and they don’t fit on delivery?
From us: our 30-day adjustment warranty covers free adjustment or remake if the device doesn’t fit. From other reputable Tier 2 sellers: similar policies typically apply. From Tier 1 or Tier 3: variable, sometimes nothing.
My new partial denture feels weird in the first week. Is something wrong?
Probably not. The first 1 to 2 weeks with any new partial denture, online or in-person, feel awkward. Your mouth needs time to adapt to a new piece of material against your gums and against your existing teeth. Normal Days 1 to 14 signs: mild soreness that moves around (not stuck in one spot), increased saliva production, slight speech adjustment, mild gag sensation if it’s a larger partial. These usually fade by Day 14. What’s NOT normal during adaptation and indicates a real fit problem: persistent rocking when you push on one side, sore spots in the exact same location every day after Day 14, food packing under the same area at every meal, audible clicking that doesn’t go away with practice. If you see the normal signs, give it the full two weeks. If you see the not-normal signs, contact your seller for an adjustment or remake. From us, that’s covered by the 30-day adjustment warranty.
How long do partial dentures from an online seller last?
Tier 2 lab-direct partials last 5 to 8 years if cared for. Tier 1 boil-and-bite lasts 6 to 18 months. Tier 3 offshore varies wildly. Lifespan correlates with material grade and fabrication standard, not channel, when the lab actually meets the standard. A Tier 2 partial denture and a dentist-fitted partial from the same lab have effectively the same lifespan.
25+ years as a commercial dental lab. Professional-grade FDA-approved materials, non-allergenic and BPA-free. Custom-made at our US dental lab. Made in coordination with licensed dentists. 1,000+ verified reviews. 60-day warranty on all custom-made products.
If lab-direct is the right tier for you
Order online. Your at-home impression kit ships in days with custom-fit trays, pre-measured putty, step-by-step instructions, and a prepaid USPS return label. Submit a photo of your impressions for free review before you send them back. The custom partial denture is then crafted at our US dental lab over 3 to 4 weeks. Every order includes a 30-day adjustment warranty (free adjustment or remake if the device doesn’t fit on delivery) and a 60-day warranty on breakage.
Real lab. Real fit. Real warranty.
Sources
[1] ISO 20795-1:2013. Dentistry, Base polymers, Part 1: Denture base polymers. International standard specifying mechanical, biological, and processing requirements for PMMA denture base materials.
[2] National Association of Dental Plans (NADP). Dental benefits coverage data including typical coverage percentages, annual maximums, and waiting periods for major services.
[3] American Dental Association. Clinical assessment criteria for removable prosthodontics. Covers finish, porosity, tissue surface, polish, and occlusal quality as quality indicators.
[4] FDA Product Classification Database. Product Code EBO: Denture, Partial, Removable. Class II medical device.
[5] National Association of Dental Laboratories. Certified Dental Laboratory (CDL) program. Voluntary lab certification covering quality systems, materials traceability, and regulatory compliance.
Flexible partial dentures are removable, made from thin nylon, and use gum-colored clasps instead of metal, so they look more natural and feel lighter.
They are a strong pick if you have a metal allergy, want no visible clasps, or found rigid partials uncomfortable.
The main catch: nylon cannot be relined or adjusted, so when your gums change shape, the partial is remade rather than refit.
They replace some teeth, not a full arch, and they need enough healthy teeth to clasp onto.
DLD flexible partials cost $549, versus roughly $1,100 to $1,700 at a dentist’s office [4].
With good care they last several years; the nylon resists breakage but can stain or scratch over time.
A partial that flexes with your mouth
If you are replacing a few missing teeth and the idea of metal clasps showing when you smile makes you wince, flexible partial dentures are probably why you are here. They are thin, they bend a little with your mouth, and they skip the metal entirely.
They are not the right answer for everyone, though, and the honest truth is that the best partial depends on your specific gap and your plans for your teeth. This guide covers what flexible dentures are made of, what they cost, the real pros and cons, and exactly who they suit, so you can tell whether flexible is your match or whether another partial would serve you better.
Want flexible without the dentist markup?
Dental Lab Direct ships custom-made flexible partial dentures directly from our certified lab — right to your door. No office visits. No waiting rooms. Save $800 or more compared to what you’d pay at a dental office.
A flexible partial denture is a removable appliance that replaces one or more missing teeth using a thin, bendable base instead of the rigid acrylic-and-metal frame of a traditional partial [2]. The replacement teeth sit on a gum-colored base, and the whole thing stays in place with clasps made from the same flexible material that hug your natural teeth, so there is no metal on show [1].
What are flexible dentures made of?
Flexible dentures are made from a nylon-type thermoplastic, a material thin enough to flex slightly under pressure yet strong enough to handle daily chewing [1]. That nylon is what gives them their three signature traits: they are lightweight, they are gum-colored and slightly translucent so your own gum tone shows through, and they contain no metal and no acrylic monomers, which makes them a good option if you have sensitivities [1]. DLD’s flexible partials are made from a professional-grade nylon resin, custom-molded from an impression of your own mouth.
The pros and cons of flexible partials
The upside:
Comfort: the base is thin and flexes, so it tends to feel less bulky and is less likely to rub [1].
Looks: no metal clasps, and a gum-toned base that blends in.
Allergy-friendly: metal-free and acrylic-monomer-free [1].
Durable: the nylon resists breakage and stands up to everyday chewing [1].
The catch:
They cannot be relined or adjusted: nylon does not refit chairside the way acrylic does, so when your gum ridge changes the partial is remade rather than refit [1].
Less adjustable over time: if you expect more extractions, you generally cannot add teeth to a flexible partial later.
Stability limits: because it rests on soft tissue, it needs stable supporting teeth and can shift in some bites.
Wear: nylon can stain and scratch over time, which can shorten its life.
That relining point is the one people are surprised by, so it is worth saying plainly: a flexible partial is built to be replaced when your mouth changes, not refit. That is not a dealbreaker, it just means you should choose flexible knowing it, especially if your dental situation is still changing.
Flexible vs acrylic vs metal partials
Flexible (nylon)
Acrylic flipper
Cast metal
Comfort
High, thin and light
Moderate
Lower (rigid metal)
Visible metal clasps
No
Sometimes
Yes
Relinable or repairable
No, replace
Yes
Yes
Metal-free / allergy-safe
Yes
Mostly
No
Best for
looks, comfort, allergies
budget, interim use
maximum stability
The short version: flexible wins on comfort and looks, acrylic wins on price and easy repairs, and metal wins on rigid stability. None is best in the abstract, it depends on your case.
Who flexible partials are really for
Flexible partials are an excellent fit if you:
Have a metal allergy or sensitivity: the metal-free build removes the problem [1].
Care about aesthetics: no clasps show, which matters most for teeth in the smile zone.
Found a rigid partial uncomfortable: the thin, flexing base is gentler on your gums.
Have a healthy mouth with stable teeth: you need enough sound natural teeth for the clasps to grip.
They are the wrong call, and another option will serve you better, if you:
Expect more extractions or want to add teeth later: a relinable acrylic or metal partial adapts; flexible does not.
Are missing a full arch: that calls for full dentures, not a partial.
Have a free-end gap with no tooth behind it: flexible can shift more in those cases.
If decay or gum disease is in the picture, treat that first, since any partial clasps onto teeth that need to be healthy.
What flexible partial dentures cost
At a dentist’s office, flexible partials run about $1,100 to $1,700, with premium versions higher, since they use specialized materials and fabrication [4]. Ordered direct from a lab, a flexible partial is $549, because you skip the office overhead. As with any denture, insurance coverage varies and often picks up only part of the bill.
Caring for flexible partials
Rinse after meals, and brush daily with a soft brush and a non-abrasive denture cleanser, never regular toothpaste, which scratches the surface. Soak them so the nylon does not dry out, and keep them away from hot water, which can warp the material. Do not try to reshape or adjust the clasps yourself, since heat distorts nylon. When the fit changes or the surface wears, plan to replace rather than repair.
What to do next, based on your situation
If you have a metal allergy or hate visible clasps: flexible is your option, metal-free with hidden clasps.
If you are replacing teeth in your smile zone: flexible blends in best.
If you will likely need more teeth removed or added later: consider a relinable acrylic or metal partial instead, since flexible cannot be added to.
If you are missing a full arch: you need full dentures, not a partial.
If you want flexible and want to save: a lab-direct flexible partial is $549 versus $1,100 or more at a dentist.
FAQ
What are flexible partial dentures made of?
A thin, bendable nylon-type thermoplastic, with a gum-colored base and clasps made from the same material, so there is no metal [1].
Can flexible dentures be relined or repaired?
Generally no. Nylon does not adjust or bond chairside the way acrylic does, so an ill-fitting flexible partial is usually remade rather than relined [1].
How long do flexible partial dentures last?
Several years with good care. The nylon resists breakage but can stain or scratch over time, and since it cannot be relined, fit changes mean replacement [1].
Do flexible partials have metal clasps?
No. The clasps are made from the same gum-colored flexible material, which is why they are hard to spot [1].
How much do flexible partial dentures cost?
About $1,100 to $1,700 at a dentist, higher for premium versions [4]. Ordered direct, $549.
Can you add a tooth to a flexible denture later?
Usually not. If you expect to lose more teeth, a relinable acrylic or metal partial is the more adaptable choice.
Are flexible partials good for front teeth?
Yes, the metal-free, gum-toned look is why many people choose flexible for the smile zone.
Metal-free, custom-fit, lab-direct
Flexible partial dentures are the comfortable, natural-looking way to replace a few teeth, as long as your case fits what nylon does well. Choose flexible for looks, comfort, and metal-free wear, pick acrylic or metal if you need something you can adjust over time, and you will end up with the partial that actually suits you.
Most people spend about 30 days getting used to new dentures. The first few days are the hardest, then it gets easier fast [3].
Soreness, extra saliva, and a slight lisp in the first week are normal and temporary.
Start with soft foods, take small bites, and chew on both sides at once to keep the denture stable.
Practice talking out loud. Reading or singing at home speeds up your speech more than waiting does.
Clean your dentures daily and take them out about 8 hours a day to rest your gums [1].
Here’s the line that matters: normal soreness fades on a schedule. Pain that worsens or outlasts the first month usually means the fit is off, not that you are doing something wrong.
Your dentures are here. Now what?
Your dentures just arrived, or they are on the way, and your stomach is somewhere between excited and nervous. That is completely normal. Getting used to new dentures is a real adjustment, and almost everyone feels a little clumsy at the start. You are in large company: more than 36 million American adults have no natural teeth, and the vast majority wear dentures [2].
Here’s the thing most first-week guides skip. They tell you it takes a few weeks and leave it there. This one gives you the actual arc, day by day, plus the one signal that tells you when something has crossed from normal to worth checking. The tips for wearing new dentures below are organized by what is normal, and when.
Dentures still feeling loose after the adjustment period?
Dental Lab Direct’s Quick Reline reshapes the fit against your gums at home — no office visit required. $24.99, or four payments of $6.25.
For most people, the full adjustment runs about 30 days, with speech and eating feeling close to natural somewhere in the 15 to 30 day range [3]. Here is the typical week-by-week:
When
What’s normal
What helps
Day 1
Bulky feeling, extra saliva, careful talking
Keep them in, sip water, go slow
Days 2-3
Soreness and pressure peak, especially after wear
Salt-water rinse, an OTC pain reliever, short rest breaks
Week 1
Eating and speaking still feel clumsy
Soft foods, read out loud
Weeks 2-4
Steady improvement, fewer sore spots
Add firmer foods gradually
Around day 30
Feels much more like your own teeth
Most people are back to a normal diet
Past the window, getting worse
Not just adjustment anymore
Time to reline or see a dentist
That last row is the one to remember. The rest of this guide gets you through the good rows and helps you recognize the last one.
How to eat with new dentures
Your gums are healing, so the first couple of weeks call for gentle eating. Start with soft foods, cut everything into small pieces, chew slowly, and use both sides of your mouth at the same time to keep the denture balanced. Bite with your canines rather than your front teeth, since front-tooth biting can tip the denture loose. Sip hot drinks carefully too, because a denture can dull your sense of heat.
Work up to: soft-cooked vegetables, flaked fish, soft bread, then firmer items over the following weeks.
Avoid for now: sticky, hard, crunchy, or chewy foods like caramel, nuts, raw apples, and tough steak. They dislodge dentures and make sore spots worse.
How to talk with new dentures
A mild lisp or a few slurred words at first is common, and it fades as your tongue and lips learn the new shape. Speed it up by practicing out loud at home. Read a page of a book, or sing along to a song you know. Singing in particular smooths out your phrasing and builds confidence. Speak a little slower than usual at first to avoid clicking. Most people notice clearer speech within a few days [3].
Sore spots: what helps, and what they are telling you
A sore spot or two during the first week is common. When one shows up, rinse with warm salt water, give your gums a rest, and steer clear of the foods that aggravate it. An over-the-counter oral gel or a mild pain reliever can take the edge off.
Here’s the part to pay attention to. Short-lived soreness that improves day to day is normal healing. Soreness that keeps coming back to the same spot, or that gets worse after the first week, is usually a fit issue, which changes what you should do.
Daily care: cleaning, soaking, and your gums
Good care keeps your dentures comfortable and lasting, and it is one of the simplest tips for wearing new dentures well. Rinse them after meals to clear food. Once a day, brush all surfaces with a soft brush and a denture cleanser or mild soap. Skip regular toothpaste, which is abrasive enough to scratch the surface. You can drop in an effervescent cleaning tablet a few times a week to handle bacteria and stains.
Take your dentures out about 8 hours a day, usually overnight, to let your gum tissue rest and recover [1]. Store them in water or a cleaning solution so they do not dry out and warp, and never use hot water, which can deform them. While they are out, brush your gums, tongue, and the roof of your mouth gently, and if you wear a partial, clean your remaining natural teeth with extra attention around the clasps.
Denture adhesives: useful, not a fix for a bad fit
Adhesive creams, powders, and pads can add grip and confidence, especially for lower dentures and especially early on. Use them as a supplement to a denture that already fits [1]. If you find yourself piling on adhesive or reapplying all day just to keep things in place, that is not an adhesive problem. It is a fit problem, which leads to the most useful thing in this guide.
Is it the adjustment, or the fit?
Here’s what most first-week advice gets wrong: it treats all early discomfort as something to simply wait out. A lot of it is. But a meaningful share of adjustment pain is actually a denture that does not sit right, and no amount of toughing it out will fix that.
Use the timeline as your guide. Soreness that eases over the first couple of weeks is adjustment. Pain anchored to the same spot, dentures that slip when you talk or eat, or discomfort that grows after week one points to fit. The good news is that many fit problems can be corrected at home with a reline, which reshapes the denture base against your gums. Persistent or worsening pain, a sore that will not heal, or dentures placed right after an extraction are different, and those are worth a dentist’s eyes. A reline or adhesive supplements a denture that is basically right. It cannot rescue one that is fundamentally wrong.
What to do next, based on your situation
Match your situation to the move.
If you just got them and feel sore: stay on soft foods, rinse with salt water, and give your gums rest breaks. Days 2 and 3 are usually the peak.
If you cannot eat much yet: that is week-one normal. Work the soft-foods list and add firmer items over the next two to three weeks.
If a lisp will not fade: practice out loud daily. Reading and singing speed it up. It almost always clears within the first couple of weeks.
If your dentures slip when you talk or eat: try a small amount of adhesive, and if you are leaning on it heavily, look at a reline to fix the underlying fit.
If pain is worsening, past about 30 days, or a sore will not heal: stop waiting it out and see a dentist. Dentures should not be continuously painful.
Still figuring out which denture is right for you?
FAQ
How long does it take to get used to new dentures?
About 30 days for most people, with the first few days being the hardest and speech and eating settling in around the 15 to 30 day mark [3].
Why do my new dentures hurt?
Early soreness is your gums adjusting to pressure, and it should ease over the first week or two. Pain that worsens or sticks to one spot usually means the fit needs a reline or a dentist’s adjustment.
Can I sleep with my dentures in?
Most guidance says take them out about 8 hours a day, usually overnight, so your gums can rest [1]. Store them in water or cleaning solution, never dry.
What can I eat the first week?
Soft foods: soup, yogurt, eggs, mashed potatoes, smoothies. Small bites, chew on both sides, and build up to firmer foods over the following weeks.
Why do I have so much saliva?
Your mouth reads a new denture as something to wash away, so it makes extra saliva at first. It settles down within a few days.
Do I need denture adhesive?
Not necessarily. Adhesive adds grip to a denture that already fits, but it is not a fix for a poor fit [1]. Needing a lot of it is a sign to reline or get the fit checked.
When should I stop adjusting and see a dentist?
If pain grows after the first week, lasts past about a month, or a sore will not heal, get it looked at. Dentures should not hurt all the time.
You will feel like yourself again
Getting used to new dentures takes a little patience, but the curve is short and it bends the right way. Go slow the first few days, eat soft, rest your gums, and practice talking, and most of the awkwardness is behind you within a month. Use these tips for wearing new dentures, and if the discomfort is really about fit, fix it instead of enduring it. When you are ready for new dentures, you can skip the dental-office markup and order direct.
Removable veneers snap over your natural teeth to cover stains, minor chips, and small gaps, with no drilling and no permanent changes.
Snap-on, clip-on, and pop-on veneers are all the same thing. The label is marketing, not a real difference.
The choice that actually matters is custom (made from an impression of your teeth) versus a one-size, off-the-shelf tray.
Removable veneers are a cosmetic cover, not dental treatment. They do not fix cavities, gum disease, bite problems, or replace the function of missing teeth.
Cost ranges widely: cheap OTC kits run $30 to a few hundred dollars, custom snap-on sets are a few hundred, and permanent porcelain runs $900 to $2,500 per tooth [4].
They last up to 2 years with care, need daily cleaning, and are not meant for 24/7 wear.
A better smile without the drill
You want a brighter, more even smile, but you are not sold on grinding down your teeth or spending thousands at the dentist. That is exactly the gap removable veneers fill. They snap over your existing teeth like a thin cosmetic cover, no shots, no enamel removal, no commitment.
Here’s the thing most articles muddle: the names. Removable veneers, clip on veneers, snap-on veneers, and pop-on veneers all describe the same category of product. Once you know that, the real decision gets a lot simpler, and this guide walks you through it: the types, what they cost, who they fit, and the one factor that separates a set you will actually wear from one you will toss in a drawer.
Want custom, not one-size?
BellaVeneers are custom-made from an impression of your own teeth — no dentist visit. FDA-approved, BPA-free, four shades, 60-day warranty. From $349 per arch.
Removable veneers are thin, tooth-colored shells that fit over your front teeth and clip on and off like a retainer [1]. They are color-matched to your smile and usually made from a durable resin or copolyester. Because nothing is bonded or filed down, putting them in and taking them out takes seconds, and your natural teeth are untouched.
They are built to cover cosmetic issues in the smile zone: surface stains, minor chips, small gaps, and slightly crooked teeth. They are not built to do anything underneath that, which is the part that matters most for your health.
The veneer types, side by side
When people say veneers, they could mean any of four different things. Here is how clip on veneers compare to the permanent options.
Type
Reversible?
Dentist visit?
Lasts
Typical cost
Porcelain
No, enamel removed
Yes, multiple
10 to 20 years
$900 to $2,500 per tooth [4]
Composite
No
Yes
5 to 7 years
$250 to $1,500 per tooth [4]
No-prep (bonded)
No
Yes
Many years
High
Removable / snap-on
Yes, anytime
No
Up to 2 years
~$30 OTC to a few hundred custom
The short version: porcelain looks the most natural and lasts the longest, but it is expensive and permanently alters your teeth. Composite is cheaper and faster but wears sooner. Removable veneers are the only reversible, no-dentist option, which is why they have become the popular entry point [2].
The choice that actually matters: custom vs off-the-shelf
Here’s what most best-veneers lists skip. Among removable veneers, the brand name on the box matters far less than how the veneers are made.
Off-the-shelf: mass-produced, one-size trays you buy online for very little. They cost the least, but the fit is bulky, the look is less natural, and they wear out fast [2]. A poor fit is not just a comfort issue either. Edges that rub can irritate your gums [3].
Custom: made from an impression of your own teeth, so they actually match your bite and your smile. They cost more than the bargain trays, but they fit better, look more natural, and last longer. This is the category BellaVeneers sits in: you take an impression at home, mail it back, and get a set built for your mouth.
So when you compare options, do not ask which brand. Ask whether they are made for your teeth, or for everyone’s.
Who removable veneers are (and aren’t) for
Removable veneers are a great fit if you have generally healthy teeth and gums and want to cover minor cosmetic flaws: light staining, a small chip, a slight gap [1].
They are the wrong tool, and can make things worse, in a few cases. Skip removable veneers, and see a dentist first, if you have:
Cavities or gum disease: a veneer covers the problem and lets it grow underneath. Treat it first [1].
Bruxism (night grinding): grinding forces can damage the veneer and your teeth, so heavy grinders are poor candidates.
Significant misalignment or bite problems: covering crooked teeth does not fix the bite, and a poor fit can add jaw strain [3].
Missing teeth you need to chew with: a veneer can mask a gap cosmetically, but it does not restore chewing function. For that, a partial denture is the real solution.
Plainly: removable veneers are a cosmetic cover, not a treatment. If something hurts, bleeds, or feels off when you wear them, stop and get it checked [1].
What removable veneers cost
Price tracks quality and customization. Bargain OTC kits start around $30, customizable pop-on sets run roughly $100 to $600, and custom snap-on veneers made from your impression land in the few-hundred range. Compare that to permanent veneers at $900 to $2,500 per tooth for porcelain, which adds up fast across a full smile [4]. One more thing to plan for: veneers are cosmetic, so dental insurance almost never covers them.
Living with removable veneers: eating, cleaning, and lifespan
Treat them a bit like a retainer. Brush them daily with a soft brush and a non-abrasive cleanser to keep stains and bacteria off. Take them out to sleep rather than wearing them around the clock. Go easy on hard, sticky, and very hot foods, which can dislodge or warp them, and check the maker’s guidance on eating. With that care, a quality set lasts up to 2 years before you reorder.
What to do next, based on your situation
If you want to cover minor stains or a small gap on a budget: removable veneers are a strong, low-risk place to start.
If you have an event in a few weeks: a custom snap-on set can be ready fast, far quicker than permanent veneers.
If you want a permanent, decades-long result: porcelain is the better fit, and that is a dentist procedure, not something we offer. Be honest with yourself about cost and the fact that it is irreversible.
If you have decay, gum disease, or grind your teeth: see a dentist first. Veneers over an untreated problem make it worse.
If you are missing teeth and want to chew with them again: look at a partial denture, which restores function. A veneer only covers the gap.
FAQ
Are veneers removable?
Some are. Removable veneers (snap-on, clip-on, or pop-on) clip over your teeth and come out anytime. Porcelain and composite veneers are bonded on permanently and cannot be removed at home [1].
What’s the difference between snap-on, clip-on, and pop-on veneers?
Nothing meaningful. They are different names for the same removable cosmetic cover. What actually differs is whether they are custom-made from your impression or a one-size OTC tray.
Can you eat with removable veneers?
Lightly, yes, but avoid hard, sticky, and very hot foods, which can dislodge or damage them. Many people take them out for big meals. Check your maker’s guidance.
How much do snap-on veneers cost?
Cheap OTC kits start around $30, and custom snap-on sets run a few hundred dollars, versus $900 to $2,500 per tooth for porcelain [4].
Do clip on veneers damage your teeth or gums?
Well-fitting ones worn as directed should not. Poorly fitting OTC veneers can rub and irritate gums over time, which is a strong argument for a custom fit [3].
Can removable veneers replace missing teeth?
They can cosmetically cover a small gap, but they do not restore chewing function. For missing teeth, a partial denture is the right option.
How long do removable veneers last?
Up to 2 years with proper care, then you reorder. Daily cleaning and gentle eating extend their life.
The smile upgrade you can actually reverse
Removable veneers are the low-commitment way to test a brighter smile: no drilling, no dentist chair, and no four-figure bill. Just remember what they are, a cosmetic cover for minor flaws, and what they are not, a fix for real dental problems. Get those straight, choose custom over one-size, and you will know exactly what you are buying.
OTC anti-snore mouthpieces are FDA-cleared for snoring, not for diagnosed obstructive sleep apnea (OSA). The regulatory line is real, and treating them as interchangeable wastes money and time.
The CPAP-alternative market has three tiers, not two: OTC ($30 to $150), DTC custom with telehealth prescription ($600 to $900 all-in), and dentist-fitted custom ($1,800 to $10,000).
All three tiers carry the same FDA Class II classification. What separates them isn’t the device. It’s the indication, the fit precision, and the distribution model.
The DTC custom tier exists because dental labs have always made these appliances. They only recently started shipping direct, skipping the office overhead that drives most of the price gap.
The AASM and AADSM jointly recommend custom-fit oral appliances over non-custom (boil-and-bite) devices for treating OSA.
If you’ve been diagnosed with sleep apnea, you need a Class II prescription appliance. Whether you get it from a dentist office or a lab-direct service is the real question.
Most products marketed as over-the-counter CPAP alternatives or non-prescription CPAP alternatives are cleared only for snoring, not for diagnosed sleep apnea. The distinction is regulatory, not marketing.
Forty dollars to three thousand dollars for the same idea
$40 anti-snore mouthpiece on Amazon. $3,000 at the sleep dentist. Both promise to replace your CPAP.
You’re on the market because something didn’t work, or you’re trying to skip a step you don’t think you need. Most people searching for over-the-counter CPAP alternatives are doing one of two things: trying to bypass a CPAP they can’t tolerate, or trying to avoid the medical system entirely. Maybe a sleep study told you what you already suspected, and the CPAP machine they sent home has been sitting on a nightstand mostly unused. Maybe your partner has stopped pretending the snoring is fine. Maybe you’ve already bought a $20 boil-and-bite from a drugstore and slept worse, not better.
Here’s the thing most people miss: there are three tiers of CPAP alternatives, not two. And the cheapest one is often the most expensive way to find out it doesn’t work for you.
The three tiers of CPAP alternatives
The CPAP-alternative market splits into three tiers, separated less by what the device does and more by how you get one. The first decision is which tier you’re actually shopping in, and most articles skip it entirely.
Tier 1. Over-the-counter anti-snore devices
Cost: $30 to $150.
What they are: Boil-and-bite mouthpieces, nasal dilators, anti-snore pillows, mouth tape, tongue-retaining devices.
Prescription: Not required.
FDA classification: Class II, cleared for snoring [1].
Fit: Generic. You form the device yourself by softening it in hot water and biting down.
Right for you if: You snore occasionally, you haven’t been diagnosed with sleep apnea, you want to test whether any oral device helps you before spending more.
The catch: OTC clearance covers snoring, not obstructive sleep apnea. If you’ve been diagnosed with OSA, an over-the-counter CPAP alternative isn’t a treatment. It’s a placeholder. Most products sold under that label are anti-snore devices first, anything else second.
Tier 2. Direct-to-consumer custom oral appliances
Cost: $600 to $900 all-in, including the sleep-test and prescription pathway.
What they are: The same FDA Class II custom oral appliances dental labs have been making for decades, ordered online. At-home impression kit, telehealth-facilitated prescription, mailed device.
Prescription: Required. Usually facilitated through a partnered telehealth sleep-test service.
FDA classification: Class II, cleared for both snoring and OSA [1].
Fit: Custom, taken from your own at-home impression.
Right for you if: You’ve been diagnosed with mild-to-moderate sleep apnea, you can’t tolerate CPAP or never started, you want the clinical-grade device without the in-office price.
The catch: A prescription is non-negotiable for OSA-cleared appliances. You’ll need either a current sleep study or an at-home test before ordering. Severe OSA cases usually need more clinical oversight than DTC provides.
Tier 3. Dentist-fitted custom oral appliances
Cost: $1,800 to $10,000, depending on practice, region, and insurance.
What they are: The same FDA Class II custom oral appliances, fitted in a dental sleep medicine office.
Prescription: Required, written by the treating dentist.
FDA classification: Class II, cleared for both snoring and OSA [1].
Fit: Custom, taken from in-office impressions, often with multiple titration appointments.
Right for you if: Your insurance reimburses dental sleep medicine well, your case is complex (severe OSA, jaw-joint issues, complex bite, implants near the bite area), you want hands-on follow-up.
The catch: Most of what you’re paying for isn’t the appliance. It’s the office overhead. Chair time, lease, billing department, follow-up appointments, and the dentist’s time. Those costs are real. They’re just not in the device.
What FDA clearance actually means
All three tiers play in the same FDA bucket: Class II medical devices for intraoral use. The Class doesn’t change. What changes is the indication.
OTC devices are cleared for snoring. Not for sleep apnea. The distinction isn’t marketing. It’s regulatory [1]. An anti-snore mouthpiece sold without a prescription is allowed to claim it reduces snoring noise. It is not allowed to claim it treats obstructive sleep apnea.
Custom oral appliances in Tier 2 and Tier 3 carry both indications. Same Class II clearance, broader claims, prescription required. The prescription requirement exists for a reason: OSA is a diagnosed medical condition, and the appliance needs to advance the lower jaw by a calibrated amount specific to your anatomy. That calibration is what separates a snoring-noise-reducer from an actual airway treatment.
Can over-the-counter anti-snore devices actually treat sleep apnea?
Short answer: no.
The American Academy of Sleep Medicine and the American Academy of Dental Sleep Medicine published a joint clinical practice guideline in 2015 that’s still the standing recommendation. For adults with OSA who can’t tolerate CPAP or prefer an alternative, the guideline recommends custom, titratable oral appliances over non-custom (boil-and-bite) options [2].
The reasoning is mechanical. Oral appliance therapy works by holding the lower jaw forward during sleep, which keeps the airway open. Too little advancement, and the airway still collapses. Too much, and your jaw aches in the morning while your bite shifts over months of use. The correct position is specific to your anatomy. Boil-and-bite mouthpieces don’t reach that position with any precision.
A 2008 head-to-head trial in American Journal of Respiratory and Critical Care Medicine compared custom and thermoplastic (boil-and-bite) appliances in patients with mild OSA. The thermoplastic device failed to reduce the apnea-hypopnea index in roughly two-thirds of participants. Dropout rates were higher too [3].
The pattern from the research: OTC for snoring may work for some people. OTC for diagnosed OSA usually doesn’t, and trying it first often delays real treatment by months.
Side-by-side comparison
OTC anti-snore
DTC custom (telehealth Rx)
Dentist-fitted custom
Typical cost
$30 to $150
$600 to $900 all-in
$1,800 to $10,000
Prescription
Not required
Required (telehealth-facilitated)
Required (from dentist)
FDA classification
Class II, cleared for snoring
Class II, cleared for OSA + snoring
Class II, cleared for OSA + snoring
Fit
Boil-and-bite, generic
Custom from at-home impression
Custom from in-office impression
Adjustability
Limited or none
High (e.g., interchangeable strap strengths)
High (titrated in-office)
Time to use
Same day
3 to 4 weeks
4 to 8 weeks plus multiple visits
Lifespan
6 to 12 months
3 to 5 years
3 to 5 years
Insurance
Rarely covered
Some plans plus HSA/FSA eligible
Most plans cover
The DTC custom tier — what it actually looks like.
Dental Lab Direct ships custom-made FDA Class II oral appliances direct from our lab to your door. Same device your sleep dentist orders. Save $1,800 or more. Telehealth Rx pathway included if you need it.
Dental labs have been making custom oral appliances for decades. The same lab that ships a $300 to $500 custom appliance to a sleep dentist’s office is the lab whose work eventually shows up in a patient’s mouth. The dentist marks the device up. Sometimes a little, sometimes 5 or 10 times the lab cost.
That markup isn’t pure profit. It pays for the office: front desk, hygienist time, lease, equipment, insurance billing, follow-up appointments, and the dentist’s own time. Those costs are real. For some patients they’re worth paying, especially when insurance covers most of it.
But the lab’s part of the equation, the actual making of the appliance, doesn’t change between tiers. FDA-approved thermoplastic materials are the same. The impression-to-device workflow is the same. Class II clearance is the same. We know this because we are that lab. Our techs ship hundreds of these appliances every month, and the box that goes to a dentist office is the same box that goes to a patient ordering direct.
What changed recently is the regulatory and technological space around telehealth. At-home impression kits got reliable enough to ship by mail. At-home sleep tests got accurate enough to diagnose OSA in non-complex cases [4]. State-by-state telehealth rules normalized enough that a licensed clinician can review your sleep study and write a prescription remotely.
That’s why a DTC custom tier exists now and didn’t five years ago. The device hasn’t changed. The path to getting it has.
The honest carve-out. This route doesn’t replace your dentist for every case. If you have severe OSA, complex bite issues, jaw-joint disorders, dental implants in the appliance bite area, or you’ve already tried oral therapy and it failed, you need an in-office sleep dentist working with your case. We’re not going to pretend otherwise, and we’ll tell you so on the phone if you call us.
Ready to Sleep Better Without the Machine?
Dental Lab Direct custom-makes your oral appliance the same way your sleep dentist does — but ships direct from the lab, cutting out the overhead.
70% less than the dentist. Custom fit. Ships to your door.
Starting at $649 · Only four payments of $162.25 · About 3–4 weeks to your door
What to do next, based on your situation
Which path makes sense depends on where you’re starting from. Here are the five most common situations, with what’s typically recommended.
You’ve been diagnosed with mild-to-moderate sleep apnea. Custom oral appliance therapy is on-label first-line treatment for mild-to-moderate OSA when CPAP isn’t preferred or tolerated [2]. The DTC custom tier fits cleanly here if you have a current sleep study, or if you’re willing to do an at-home test for prescription purposes.
You’ve been diagnosed with severe sleep apnea. Custom oral appliance therapy alone usually isn’t the right call for severe OSA. CPAP, BiPAP, or surgical options (including the Inspire implant for select cases) are typically where treatment starts. Your sleep physician or a dental sleep medicine specialist should be your first stop. Buying a Tier 2 appliance for a severe case is the wrong call, and we’ll tell you that too.
You snore loudly or regularly but have never been tested. Get a sleep test before buying anything. At-home sleep tests are accurate enough for diagnosis in most non-complex cases and run $79 to $219 depending on the provider. Once you have a result, come back to this article and pick the tier that matches.
You tried CPAP and couldn’t stick with it. You’re not unusual. CPAP non-adherence is the most common reason patients end up reading articles like this one. The AASM/AADSM guideline recommends custom oral appliances as the alternative for CPAP-intolerant patients with mild-to-moderate OSA [2]. If your case is mild-to-moderate, the DTC custom tier is the cost-savvy fit. If your case is more severe, talk to your sleep physician about Inspire or another modality.
You tried an over-the-counter mouthpiece and it didn’t work. The most likely reason is fit, not the concept. Generic boil-and-bite can’t reliably deliver the calibrated mandibular advancement OSA treatment needs. Stepping up to a custom-fit appliance solves the fit problem without abandoning the underlying idea.
Still not sure which scenario fits you?
If it’s a different situation entirely, yours or someone you know’s, our support team can help you think it through. We’ll point you to the right tier even when that tier isn’t us. Call 1-888-591-2220 or reach out through our contact page.
FAQ
Is there a non-prescription CPAP alternative that actually works?
For snoring alone, yes – over-the-counter CPAP alternatives like boil-and-bite anti-snore mouthpieces and nasal dilators are cleared for that purpose. For diagnosed obstructive sleep apnea, no – the FDA classification draws that line clearly: Class II OSA-indicated devices require a prescription regardless of where you buy them [1].
Do over-the-counter mouthpieces work for sleep apnea?
The clinical evidence says they’re substantially less effective than custom-fit appliances for diagnosed OSA. The AASM/AADSM 2015 guideline recommends custom over non-custom oral appliances for this reason [2].
What’s the difference between an anti-snore mouthpiece and a sleep apnea device?
The FDA indication is the main difference. Anti-snore mouthpieces are cleared to reduce snoring noise. Sleep apnea devices (oral appliance therapy) are cleared to treat the underlying airway collapse. Custom oral appliances usually carry both indications. OTC devices typically carry only the snoring indication.
How much does a custom oral appliance cost compared to CPAP?
A CPAP machine runs $500 to $3,000 plus ongoing supply costs for masks, tubing, and filters. A custom oral appliance runs $600 to $900 in the DTC tier or $1,800 to $10,000 in the dentist-fitted tier, with no ongoing supplies beyond occasional replacement straps or relines.
Are oral appliances covered by insurance?
Often yes when fitted by an in-network dentist. DTC appliances are sometimes reimbursed depending on your plan, and HSA and FSA funds usually cover them. The best move is to call your insurance and ask about reimbursement for code E0486 (oral device for OSA).
How do I know if I have sleep apnea, or if I just snore?
Common OSA symptoms include witnessed pauses in breathing, gasping or choking awake, severe daytime sleepiness, morning headaches, and difficulty concentrating. Snoring alone may not indicate OSA, but the only way to know for sure is a sleep test.
25+ years as a commercial dental lab. FDA-approved materials. Made in coordination with licensed dentists. 1,000+ verified reviews. 60-day warranty on all custom-made products.
If you’re ready for the custom tier
If you’ve decided custom oral appliance therapy is your next step and the DTC tier fits your situation, here’s how it works at DLD. Order online. Get your at-home impression kit in a few days. Mail it back. Receive your custom appliance in about three to four weeks. We handle the sleep test and prescription through our partnered telehealth provider when you need one.
No office. No markup. No compromise on fit.
View the EMA Anti-Snore / Sleep Apnea Device →
Sources
[1] FDA Product Classification Database. Product Code LRK: Intraoral devices for snoring and/or obstructive sleep apnea. Class II. accessdata.fda.gov
[2] Ramar K, Dort LC, Katz SG, et al. Clinical Practice Guideline for the Treatment of Obstructive Sleep Apnea and Snoring with Oral Appliance Therapy: An Update for 2015. Journal of Clinical Sleep Medicine 2015;11(7):773-827. AASM/AADSM joint guideline. jcsm.aasm.org
[3] Vanderveken OM, Devolder A, Marklund M, et al. Comparison of a Custom-made and a Thermoplastic Oral Appliance for the Treatment of Mild Sleep Apnea. American Journal of Respiratory and Critical Care Medicine 2008;178(2):197-202.
[4] American Academy of Sleep Medicine. Clinical Practice Guideline for Diagnostic Testing for Adult Obstructive Sleep Apnea. aasm.org
75% of CPAP users travel with their machine. The 25% who don’t are usually either skipping treatment, which is risky, or already using an alternative that fits in a bag.
True CPAP alternatives for travel mean no electricity, no humidifier water, no airline luggage friction, and no setup time. Travel CPAP machines are smaller, but they are still CPAP.
Four real travel-friendly options exist: custom oral appliances, travel CPAPs, nasal EPAP/valves, and positional therapy. Each fits a different case.
Travel-friendly has five measurable criteria: size, power requirement, water and maintenance, TSA and airline ease, setup time. Custom oral appliances score perfectly on all five.
The AASM and AADSM jointly recommend custom-fit oral appliances as a first-line alternative for mild-to-moderate OSA when CPAP isn’t preferred or tolerated.
The most underused pattern: CPAP at home, oral appliance for the road. Legitimate, AASM-supported for the right cases.
Severe OSA cases should bring their CPAP. Travel convenience doesn’t outweigh effectiveness for severe disease.
The CPAP that’s still sitting in your closet
75% of sleep apnea patients travel with their CPAP machine [3]. Traveling with sleep apnea isn’t optional, but bringing the machine often is, and most articles in this space don’t explain what the realistic alternatives actually are. Of the 25% who skip the machine, most either skip treatment entirely (which is risky) or have already found something that fits in a bag without a fight.
If you’ve ever lugged a CPAP through TSA, listened to it on a red-eye, or fought with a hotel humidifier fill-cup at midnight, you already know why this article exists. The friction adds up. By night three of a trip, the math starts pushing you toward skipping a night. By night seven, you might be doing it on autopilot.
This isn’t an anti-CPAP article. CPAP is the gold standard for diagnosed OSA, and we’ll tell you when not to substitute it. But for the right cases, a travel-friendly alternative isn’t a compromise. It’s the same Class II clearance, the same clinical evidence, just a device that fits in a Dopp kit.
What “travel-friendly” actually means: 5 criteria
Most articles list options without defining the bar. Here’s the bar.
1. Size and weight. Pocket-able versus carry-on hog. The realistic threshold for compact: fits in a small pouch alongside your travel toiletries.
2. Power requirement. None, battery, or outlet. Outlet-only solutions create friction in hotels, cabins, campsites, and international travel where outlets need adapters.
3. Water, humidifier, and cleaning supplies. CPAPs need distilled water and overnight cleaning windows. Most travel disrupts both. Many travelers skip the humidifier entirely on the road, which compromises comfort.
4. TSA, airline, and hotel friction. TSA allows CPAPs as carry-on without counting them toward your bag limit, per TSA guidance. Inspections still happen. Hotel outlets aren’t always where you’d want them.
5. Setup and breakdown time. Three minutes per night across a 10-day trip is 30 minutes of fiddling you wouldn’t choose to do at home.
The four options below get scored against these five criteria. Then we put them in a side-by-side table.
Cost: $600 to $3,000 (DTC custom tier to dentist-fitted). See our OTC vs Custom CPAP Alternatives guide for tier breakdown.
Size and weight: About 14 oz with case. Pocket-sized.
Power: None.
Water/maintenance: Rinse with water after use, store in case. No supplies.
TSA/airline: Zero issues. Never inspected, never restricted.
Setup time: Place in mouth. About 10 seconds.
Right for you if: You have mild-to-moderate OSA, you’re CPAP-intolerant, or you want one device that works for both home and travel.
The catch: Needs a prescription. OSA-cleared Class II appliances aren’t sold over the counter. Severe OSA cases need CPAP, not just an oral appliance [1][2]. DLD’s EMA Anti-Snore / Sleep Apnea Device is one example of this category. We make these. See the mid-article callout for specifics.
Option 2. Travel CPAP machine (not a true alternative, but worth covering)
Cost: $700 to $1,500 for the major travel CPAP models. Battery packs add $200 to $400.
Size and weight: 0.66 to 1 lb. Pocket-able as machines go.
Power: Outlet or battery (battery sold separately).
Water: Optional waterless heat-moisture exchanger. Still needs filter changes.
TSA/airline: Allowed as carry-on, doesn’t count toward bag limit per TSA, but still subject to inspection.
Setup time: 2 to 5 minutes per night for mask fit, hose, optional water.
Right for you if: You have severe OSA, you’re already adherent to CPAP, or you don’t want to introduce a new therapy on the road.
The catch: Still a machine. Still has the friction. A smaller CPAP is not freedom from CPAP.
Option 3. Nasal EPAP / nasal valves
Cost: $2 to $3 per night. Single-use disposable.
Size and weight: Tiny. Fits in a wallet. Grams, not ounces.
Power: None.
Water/maintenance: None. Disposable.
TSA/airline: Zero issues.
Setup time: 30 seconds to place in nostrils.
Right for you if: You have mild OSA, you’re on a short trip, or you want a travel-only solution alongside a permanent treatment at home.
The catch: Less effective than custom oral appliances per clinical evidence. Daily cost adds up on longer trips. Some users find them uncomfortable.
Option 4. Positional therapy and lifestyle
Cost: $30 to $150 for anti-snore pillows, positional vests, or smart sleep trackers.
Size and weight: The pillow takes space. A vest packs small.
Power: None.
Right for you if: You have positional OSA, meaning your apnea events are significantly worse when you sleep on your back.
The catch: Only works for specific OSA patterns. A diagnostic sleep study should confirm positional OSA before relying on this alone.
Side-by-side comparison
Custom oral appliance
Travel CPAP
Nasal EPAP
Positional therapy
Size/weight
Pocket case, 14 oz
0.66 to 1 lb machine
Wallet-size, grams
Pillow or small vest
Power required
None
Outlet or battery
None
None
Water/maintenance
Rinse only
Optional HME, filter swaps
None (disposable)
None
TSA/airline
Zero issues
Allowed, but inspected
Zero issues
Zero issues
Setup time
10 seconds
2 to 5 minutes
30 seconds
Sleeping position
Mild-mod OSA evidence
First-line per AASM [2]
Standard of care
Approved, lower-tier
Limited cases only
Cost
$600 to $3,000
$700 to $1,500
$2 to $3 per night
$30 to $150
The lightest sleep apnea solution you’ll ever pack.
DLD’s EMA device fits in a Dopp kit, needs no outlet, and clears TSA in seconds. Custom-fit from your at-home impression, shipped direct from the lab. Starting at $649 — or four payments of $162.25.
This route doesn’t replace CPAP for every case. If any of the following apply, don’t downgrade your therapy for travel convenience.
Severe OSA (AHI greater than 30 per your sleep study)
High-altitude travel above ~8,000 feet, where oxygen pressure drops and apnea events increase
New diagnosis or recent therapy changes. Don’t introduce more variables mid-trip
High-stakes work travel where compromised sleep has real performance consequences
We’ll say this directly because most articles in this space won’t. If you’re in one of those cases, bring the CPAP. Travel CPAPs are small, allowed by TSA, and don’t count toward your bag limit. The friction is worth it.
The double-life pattern: CPAP at home, oral appliance for the road
Here’s the pattern most travel articles miss.
A meaningful chunk of CPAP users keep their machine at home and use an oral appliance only when they travel. The AASM and AADSM clinical practice guideline supports this pattern for mild-to-moderate OSA when home CPAP adherence is solid [2]. You get the gold-standard treatment at home, and a Class II travel solution that doesn’t add airline friction.
The lab-side perspective: a single custom oral appliance lasts 3 to 5 years. Buying one solution that serves both as a permanent backup and a travel-friendly device is the same purchase. We see this pattern weekly. Customers with CPAP closets and oral appliance go-bags.
Ready to Sleep Better Without the Machine?
Dental Lab Direct custom-makes your oral appliance the same way your sleep dentist does — but ships direct from the lab, cutting out the overhead.
70% less than the dentist. Custom fit. Ships to your door.
Starting at $649 · Only four payments of $162.25 · About 3–4 weeks to your door
What to do next, based on your situation
Which path makes sense depends on where you’re starting from. Five common situations, with what’s typically recommended.
You’re an established CPAP user, looking for a travel-only alternative. Custom oral appliance is the most-studied option. For mild-to-moderate OSA, the DTC custom tier is the cost-savvy fit. Keep using CPAP at home for AHI control [2].
You snore on trips but have never been formally tested. Get a sleep test first. Travel exacerbates symptoms (alcohol, altitude, weight changes) but doesn’t itself indicate OSA. Once you have a diagnosis, come back and pick the tier that fits.
You have mild-to-moderate OSA already diagnosed. A custom oral appliance works for both home and travel. You don’t need two solutions. The DTC tier saves you over $1,500 versus in-office fitting.
You have severe OSA. Bring the CPAP. Travel CPAPs are smaller, allowed by TSA, and don’t count toward your bag limit. Severe OSA is the wrong condition to compromise on during travel.
You’re already using an OTC anti-snore mouthpiece for travel and it’s not cutting it. Fit is the issue, not the concept. Upgrading to a custom oral appliance solves the fit problem at the same form factor. Our OTC vs Custom CPAP Alternatives guide covers the tier comparison in detail.
Different travel pattern not covered above?
If your situation doesn’t fit neatly into one of these (maybe you’re a flight attendant with shift work, you split time between two cities, or your trips routinely involve high altitude), our support team can think it through with you. Call 1-888-591-2220 or reach out through our contact page.
FAQ
Can I skip my CPAP for one night while traveling?
Some patients notice symptoms returning even after a single missed night (daytime fatigue, snoring, morning headaches), though clinical evidence on how quickly effects appear varies. For most patients, occasional missed nights pose limited short-term risk. The larger concern is cumulative non-adherence across a longer trip, which is well-documented in OSA outcome literature. Having an alternative on hand reduces the temptation to skip when the friction gets high.
Is an oral appliance as effective as CPAP for travel use?
For mild-to-moderate OSA, the AASM/AADSM 2015 guideline recommends custom oral appliances as a first-line alternative when CPAP isn’t preferred or tolerated [2]. For severe OSA, CPAP remains the gold standard and shouldn’t be substituted for travel convenience.
How small is a custom oral appliance?
A typical mandibular advancement device weighs about 14 oz with its case. Fits in a Dopp kit, a small zipped pouch, or a jacket pocket.
Do I need a prescription to buy a travel CPAP alternative?
OTC anti-snore mouthpieces and nasal stents don’t require a prescription but are FDA-cleared for snoring only, not OSA. Custom oral appliances and travel CPAPs require a prescription because they’re Class II medical devices indicated for OSA treatment [1].
What should I know about traveling with sleep apnea at altitude?
For many patients, sleep apnea events increase at altitude due to lower oxygen pressure. If you’re traveling to elevations above ~8,000 feet, bring your CPAP even if you’d consider skipping it at sea level. Altitude is one of the clearer cases where travel convenience doesn’t outweigh treatment effectiveness.
Are nasal EPAP devices a real treatment or just for short-term use?
They’re FDA-cleared for OSA, but clinical effectiveness varies widely by user. They’re best as a travel supplement, not a permanent replacement for CPAP or custom oral appliances in moderate-to-severe cases.
25+ years as a commercial dental lab. FDA-approved materials. Made in coordination with licensed dentists. 1,000+ verified reviews. 60-day warranty on all custom-made products.
If you’re ready for a travel-friendly oral appliance
DLD’s EMA Anti-Snore / Sleep Apnea Device is FDA-cleared Class II, custom-fit from an at-home impression. Weighs about 14 oz with case. No batteries, no water, TSA-friendly.
Process: order online. At-home impression kit ships in a few days. Mail it back. Custom appliance arrives in about three to four weeks. We handle the sleep test and prescription through our partnered telehealth provider if you need one.
No outlets. No water. No mask straps.
View the EMA Anti-Snore / Sleep Apnea Device →
Sources
[1] FDA Product Classification Database. Product Code LRK: Intraoral devices for snoring and/or obstructive sleep apnea. Class II. accessdata.fda.gov
[2] Ramar K, Dort LC, Katz SG, et al. Clinical Practice Guideline for the Treatment of Obstructive Sleep Apnea and Snoring with Oral Appliance Therapy: An Update for 2015. Journal of Clinical Sleep Medicine 2015;11(7):773-827. AASM/AADSM joint guideline. jcsm.aasm.org
[3] SleepApnea.org. 75% of People with Sleep Apnea Travel with their CPAP Machines. sleepapnea.org
[4] TSA.gov. Special procedures for travelers with CPAP machines and medical devices. tsa.gov
[5] American Academy of Sleep Medicine. Clinical Practice Guideline for Diagnostic Testing for Adult Obstructive Sleep Apnea. aasm.org